Okta
This guide connects solidtime to Okta (Workforce Identity Cloud).
You need:
- An Okta org and an admin account that may create app integrations.
- The callback URL of your solidtime provider. Create the provider in solidtime first with the key
okta(see Adding an identity provider); the callback URL is thenhttps://time.your-company.com/sso/okta/callback. - A group in Okta for the people who may use solidtime, for example
solidtime-users(Directory → Groups → Add group).
1. Create the app integration
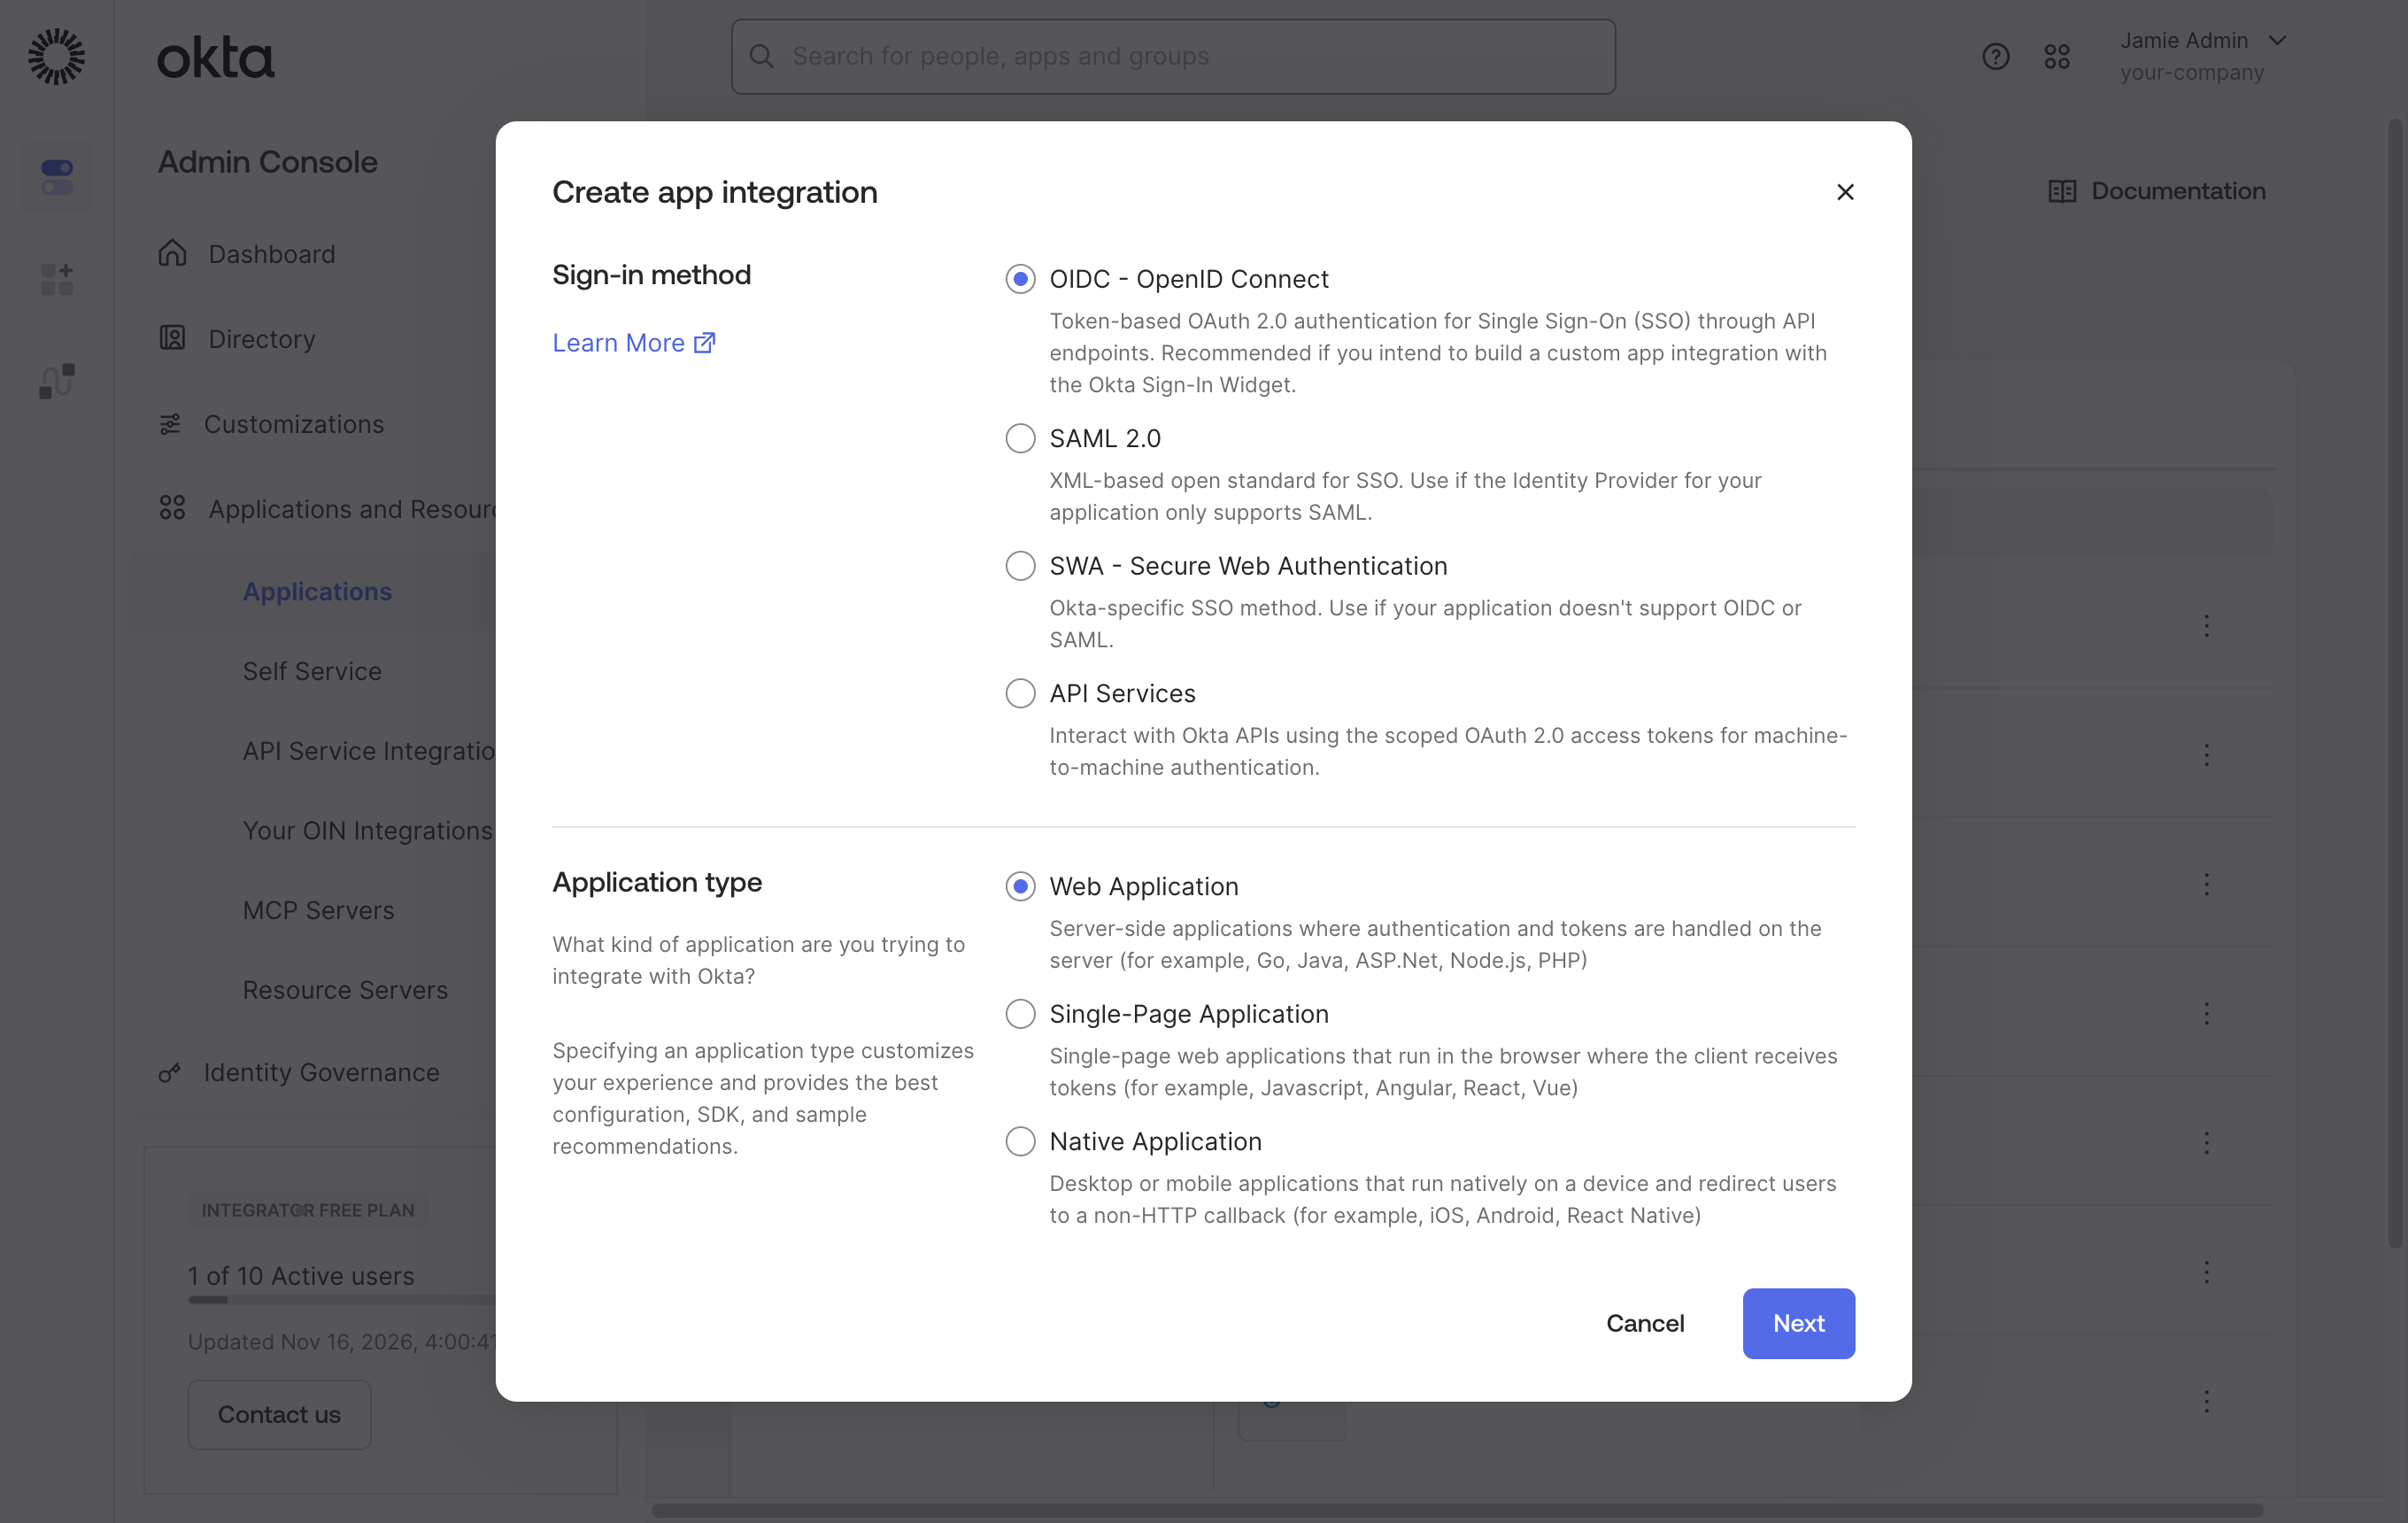
In the Okta Admin Console, go to Applications and Resources → Applications → Create App Integration. If Okta asks for an experience, choose Classic experience. Then choose OIDC - OpenID Connect and Web Application, and click Next.
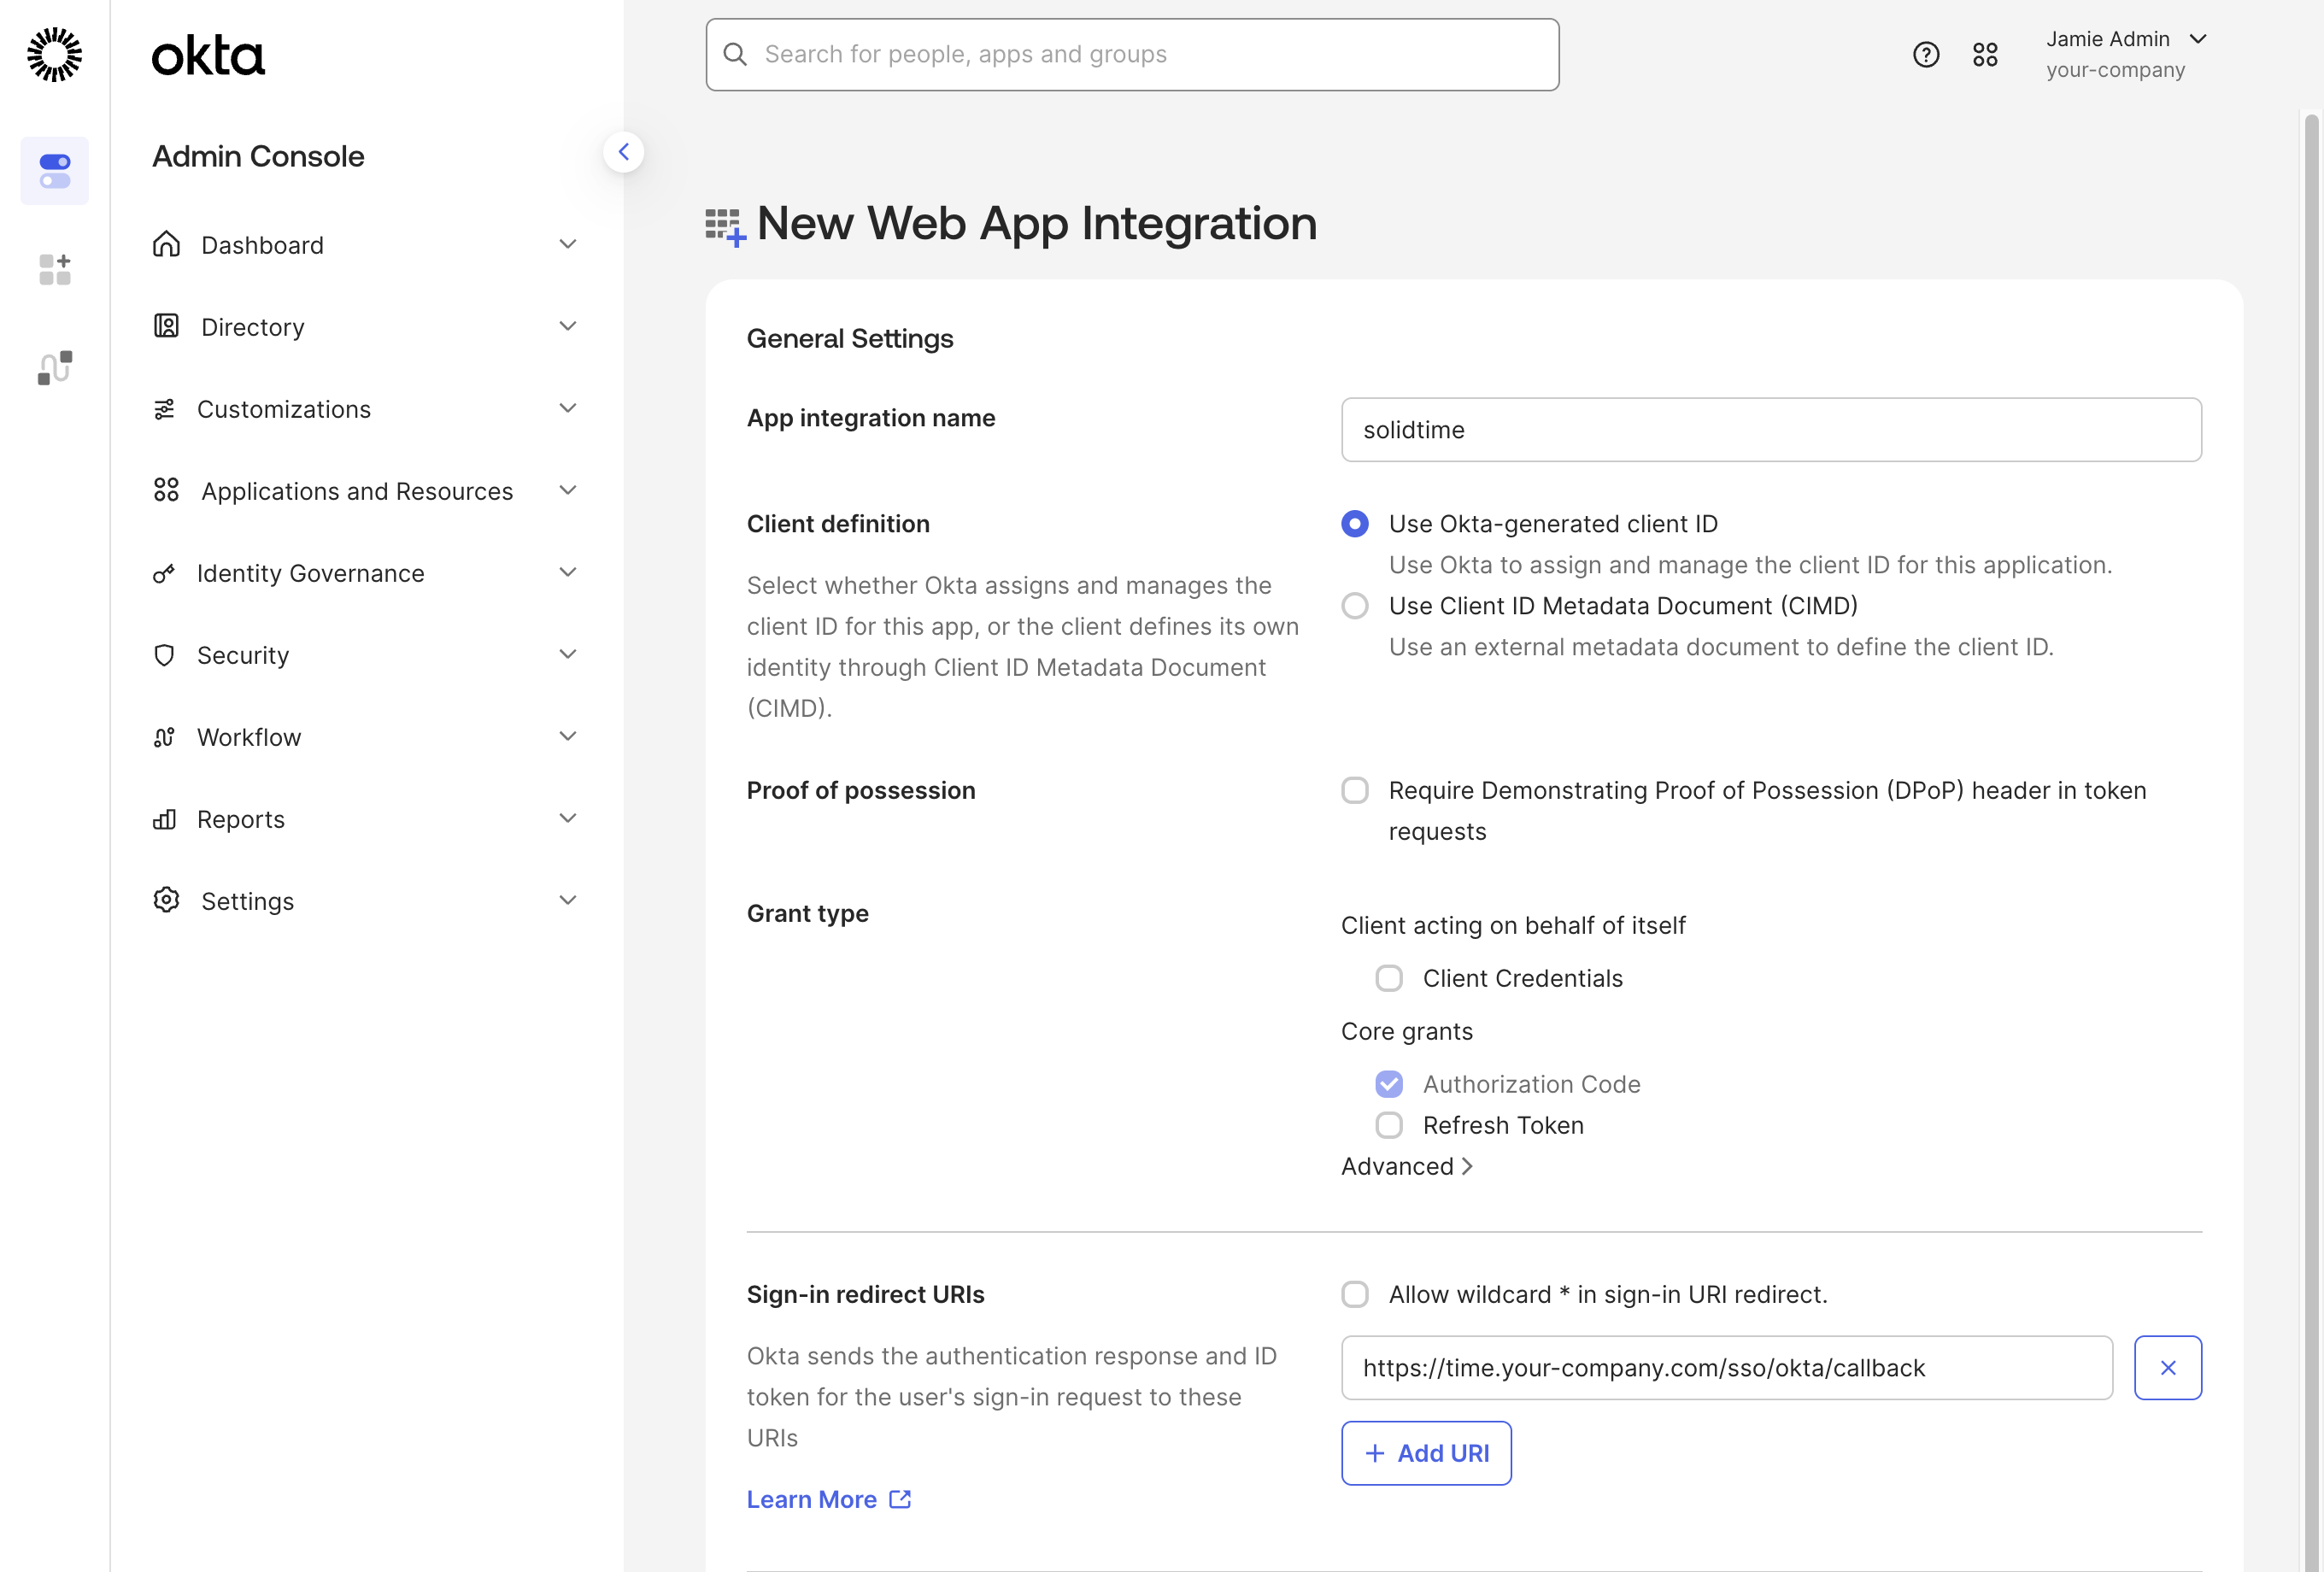
Fill in:
- App integration name:
solidtime - Client definition: keep Use Okta-generated client ID.
- Grant type: keep Authorization Code.
- Sign-in redirect URIs: replace the example with the callback URL
https://time.your-company.com/sso/okta/callback. - Sign-out redirect URIs: remove the example entry.
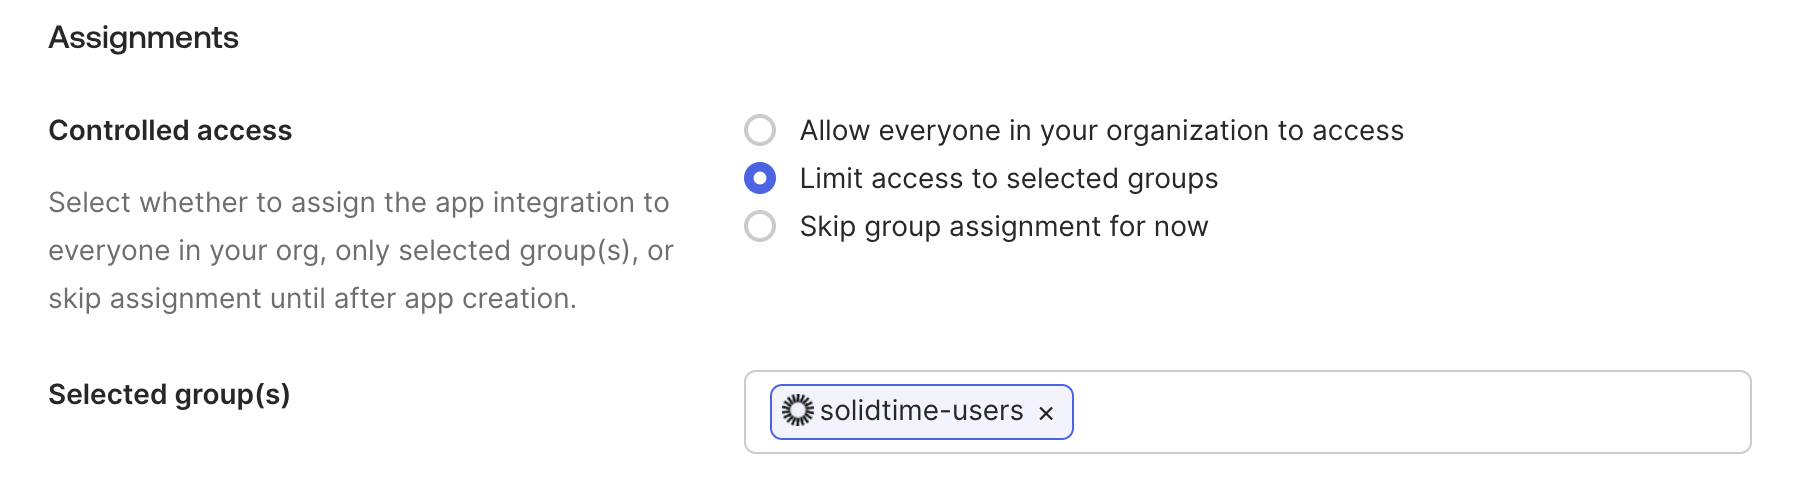
Under Assignments, choose Limit access to selected groups and select your group. Only assigned users can sign in, which makes this the most important access control for Okta. You can change the assignments later on the app's Assignments tab.
Click Save.
2. Copy the credentials
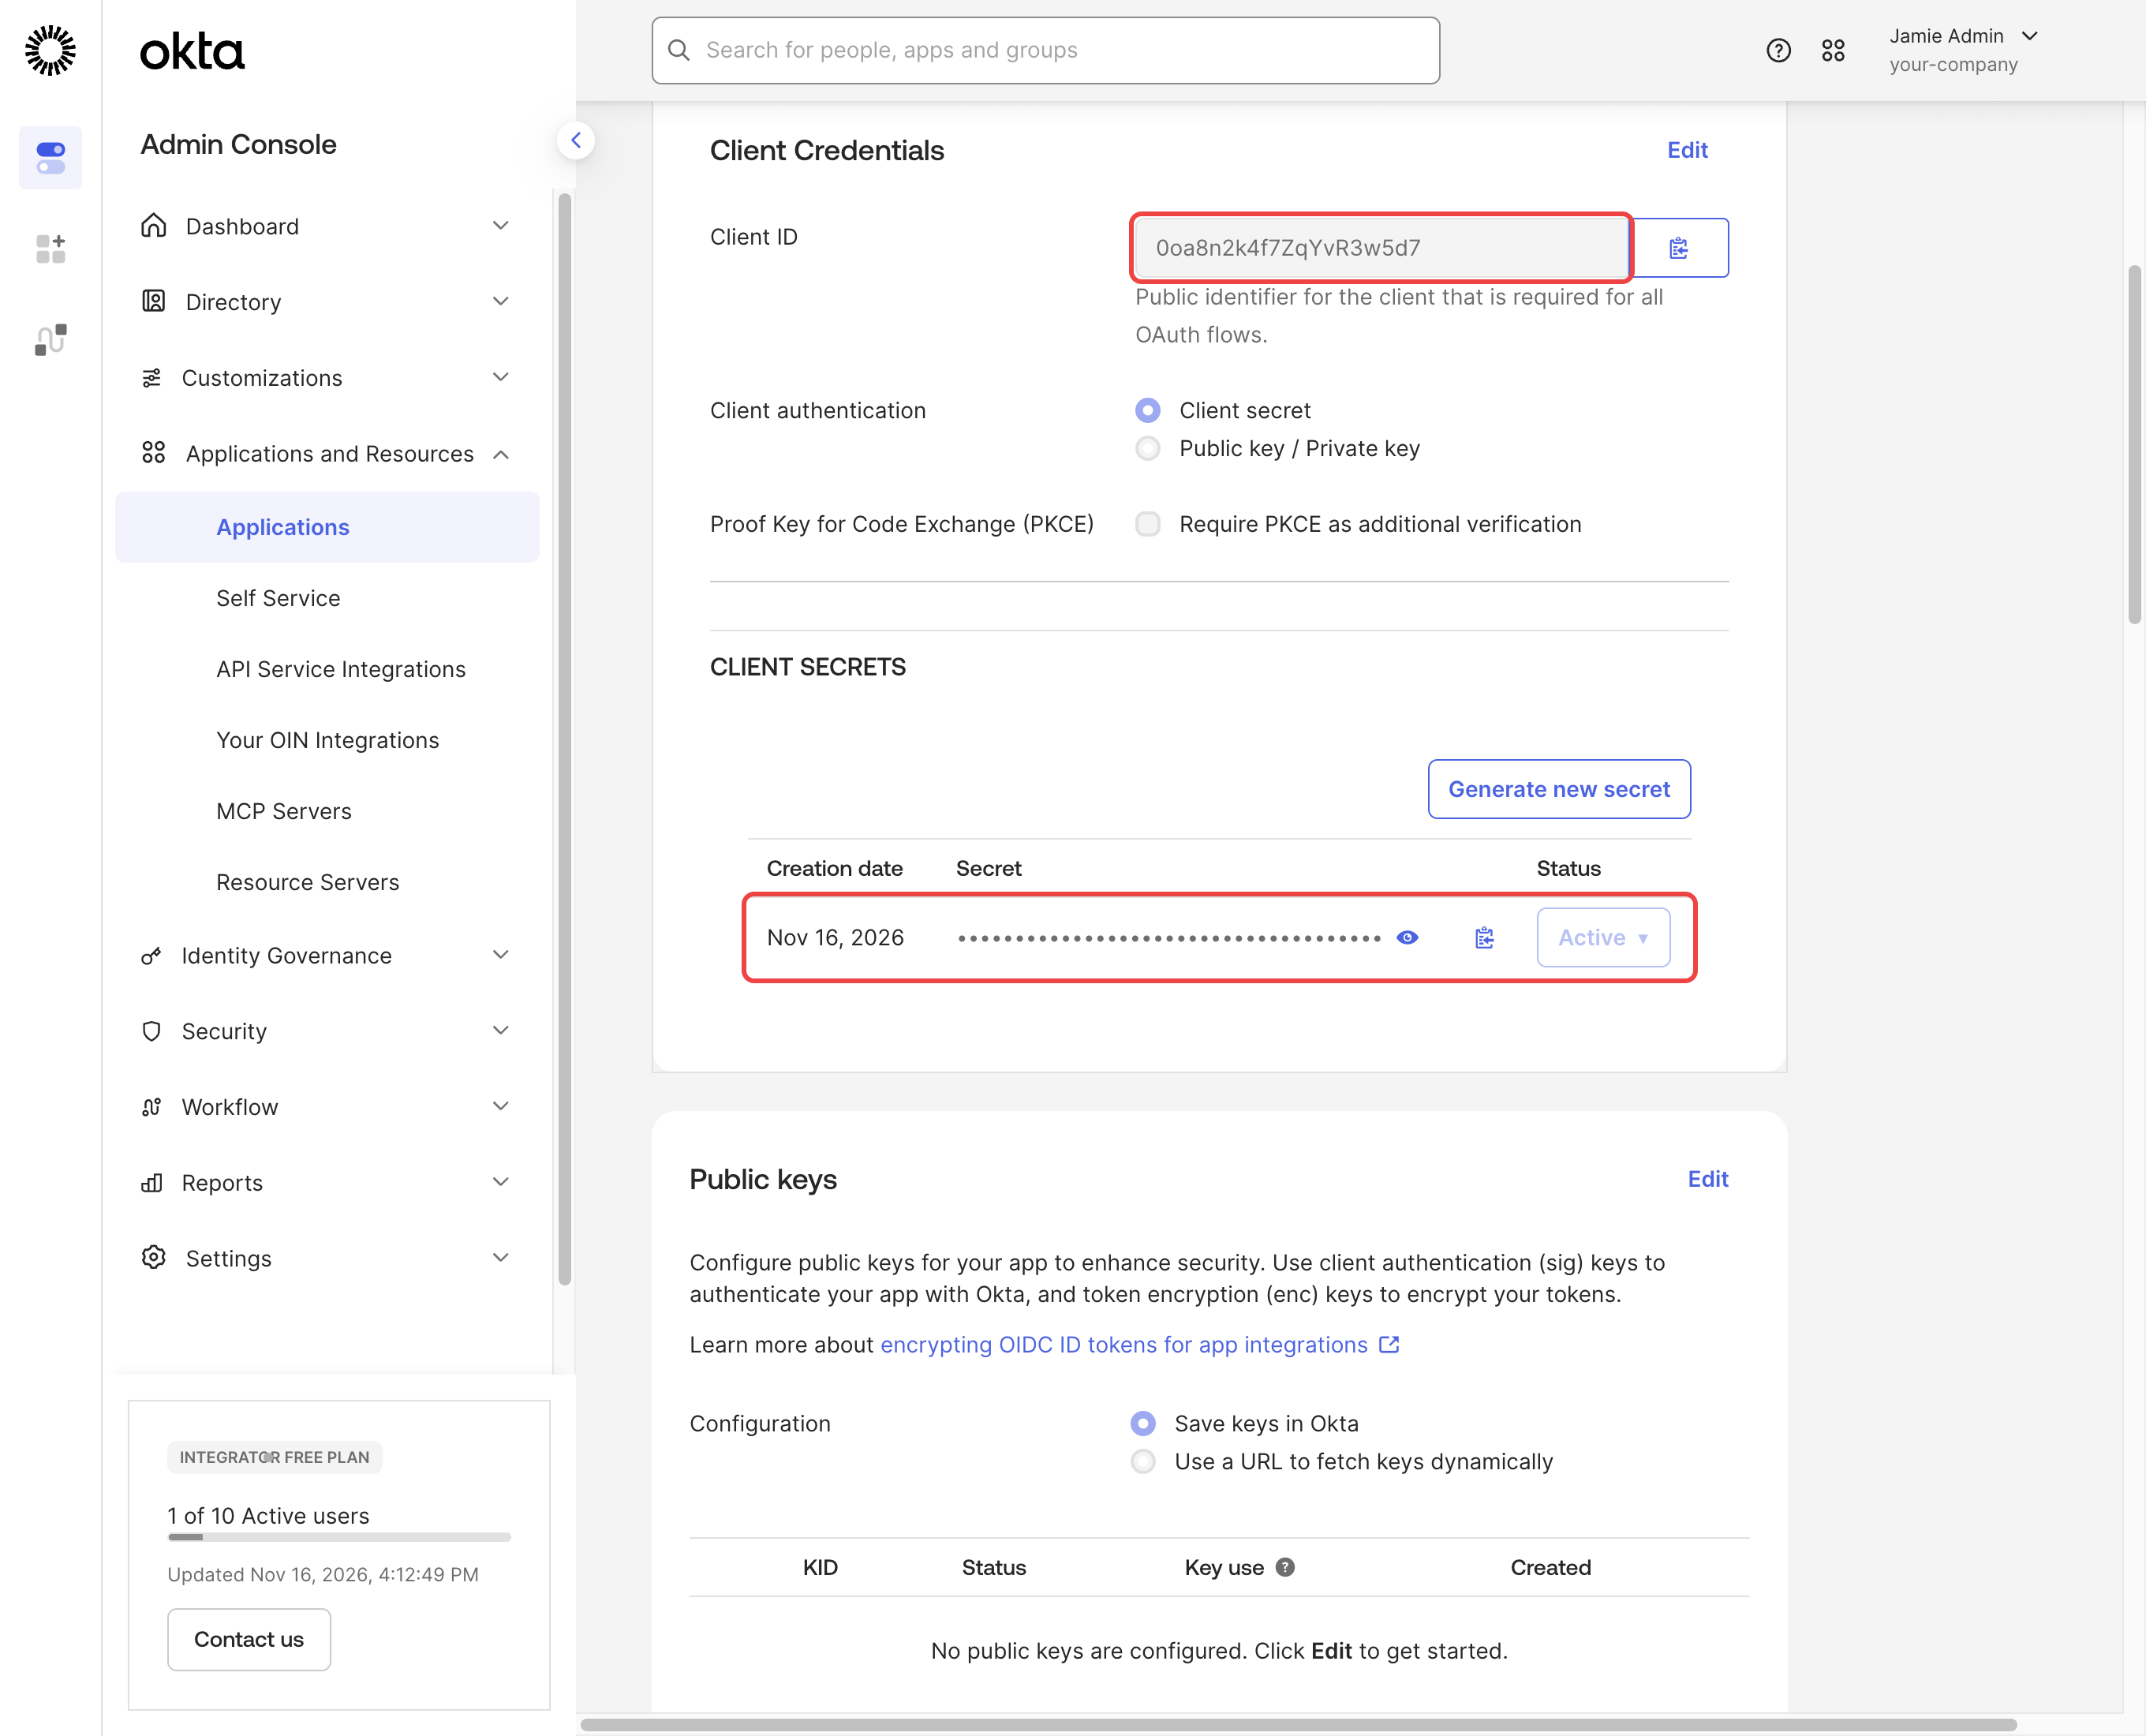
On the app's General tab, copy the Client ID and the client secret under Client Credentials. Keep Client authentication at Client secret.
3. Add a groups claim (optional)
To check group membership in solidtime as well, let Okta send a groups claim. On the app's Sign On tab, open Show legacy configuration under Token claims, click Edit next to Group Claims, keep Groups claim type at Filter, keep the name groups, choose Starts with and enter solidtime. Click Save.
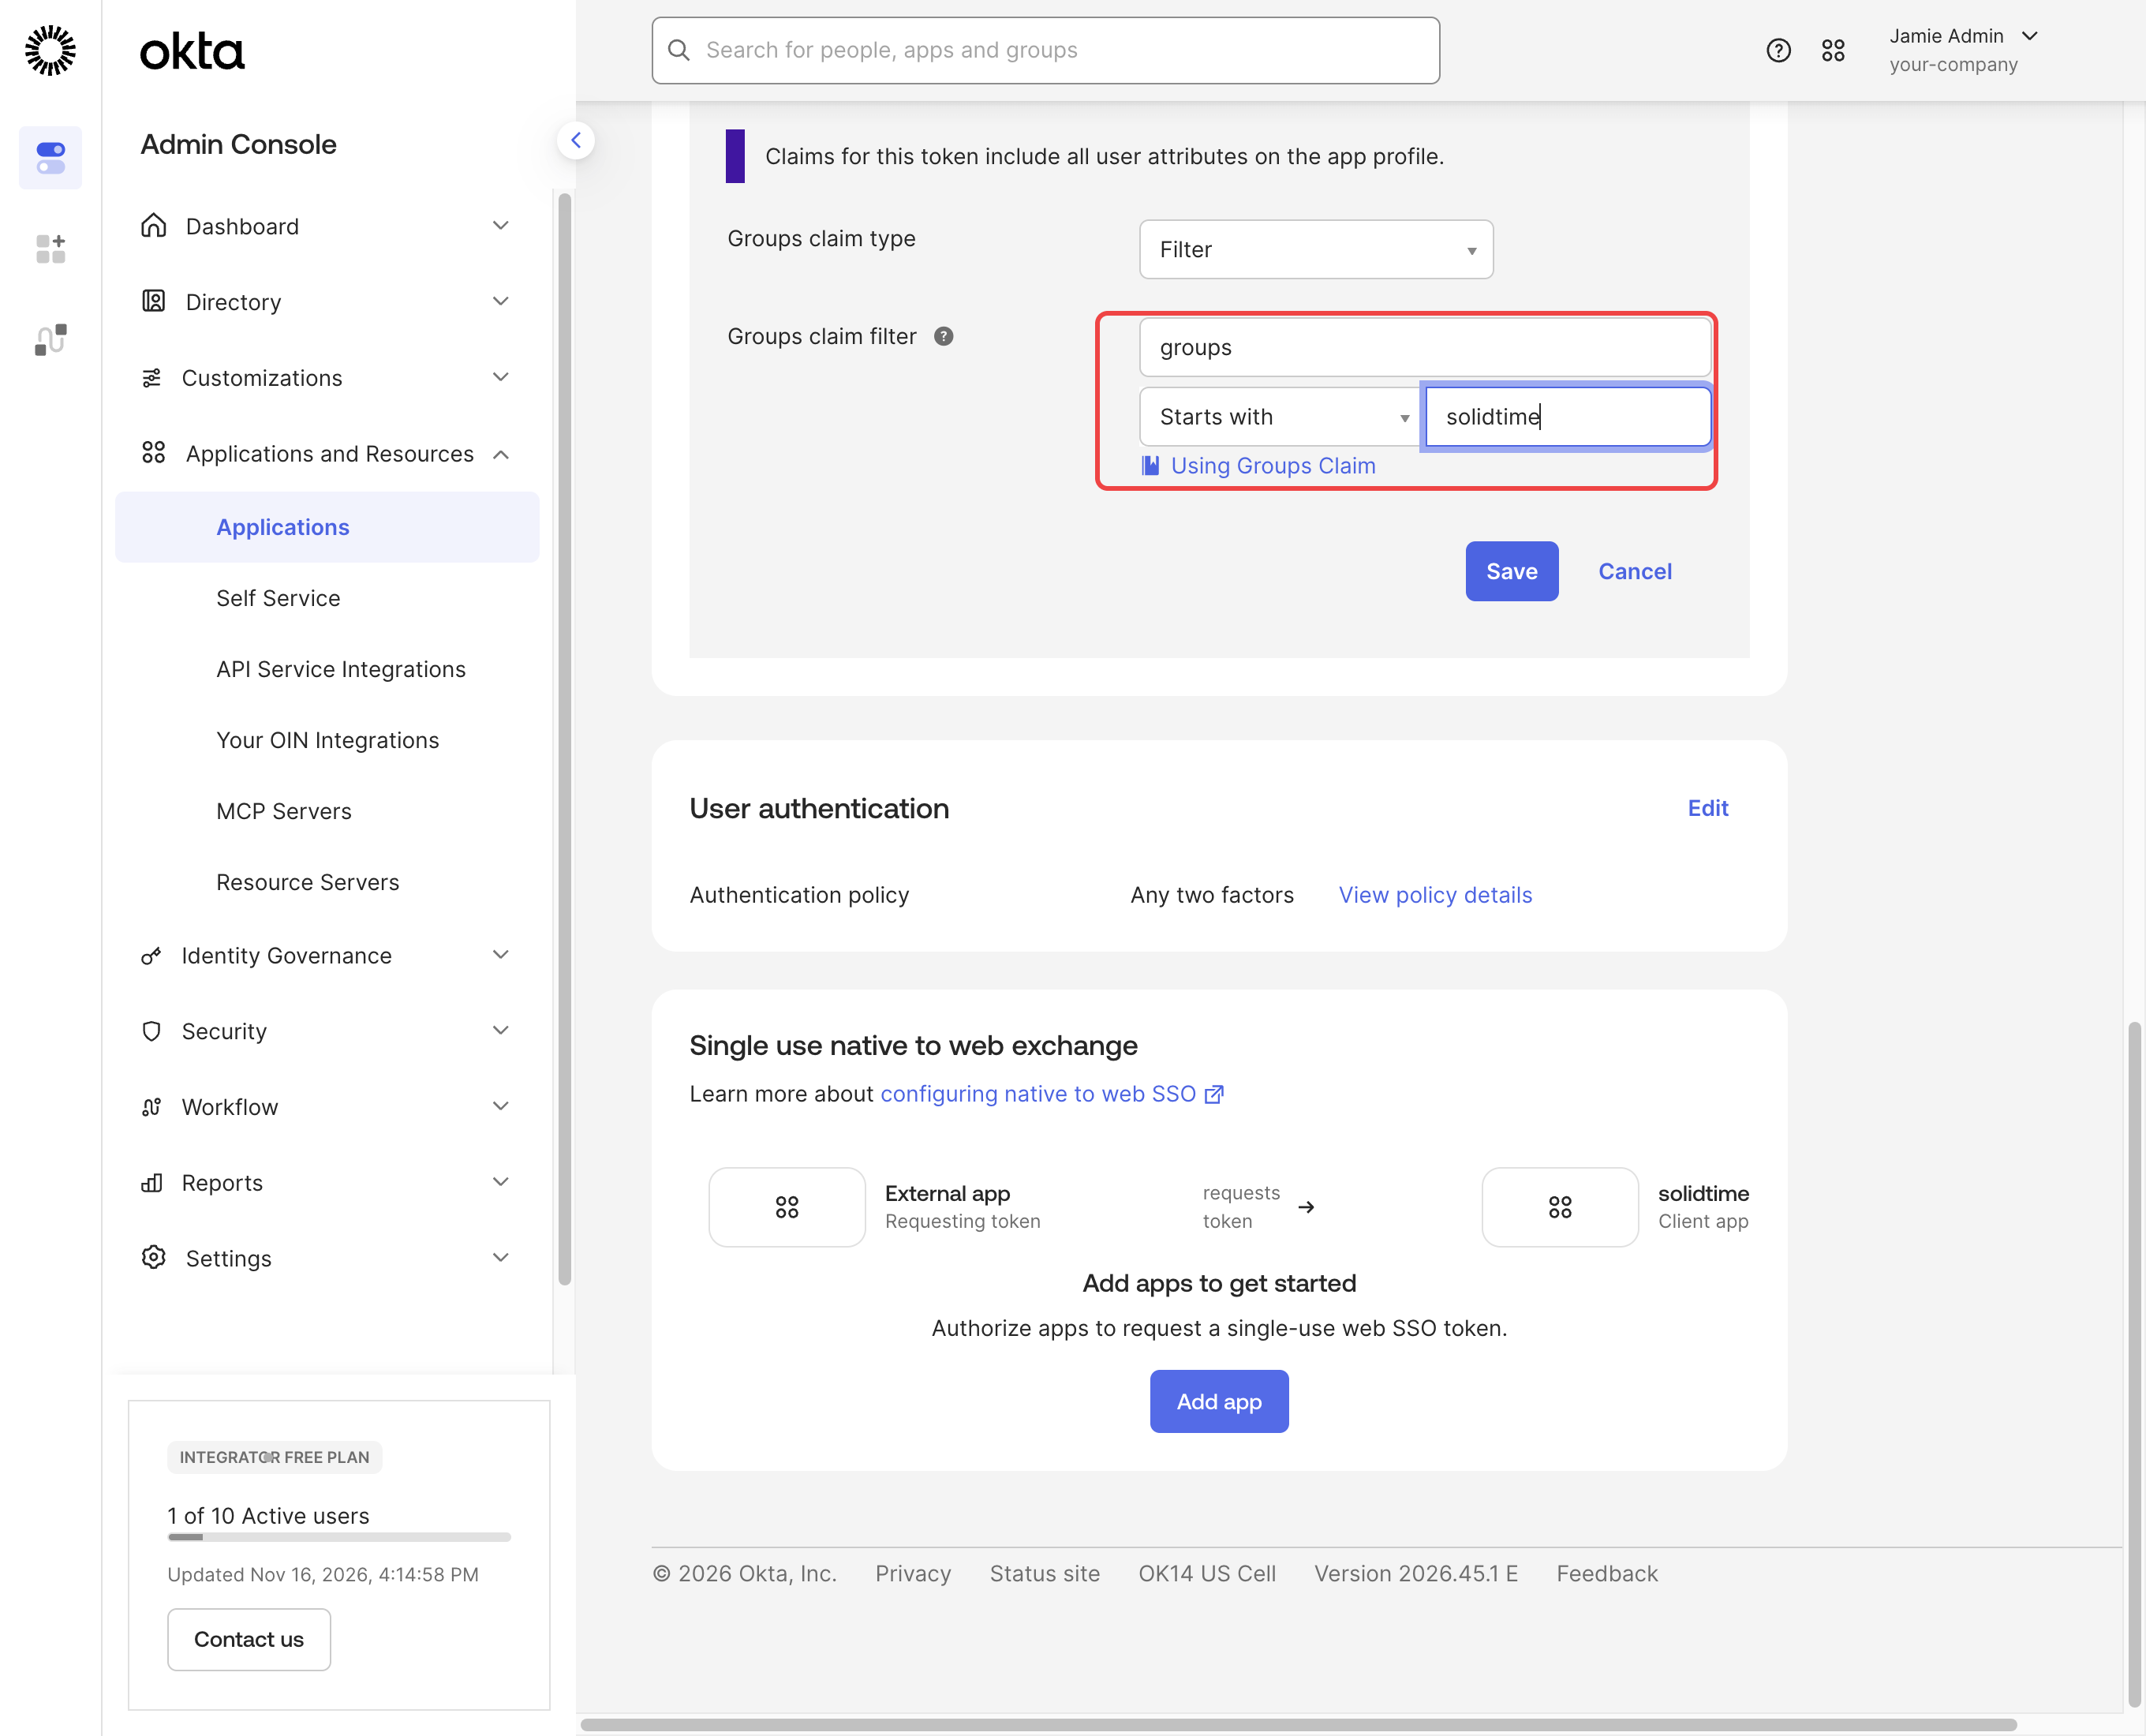
The Add expression button above it can't be used for this: Okta reserves the name groups there.
4. Configure the provider in solidtime
Edit the provider in solidtime and fill in Credentials and endpoints:
| Field | Value |
|---|---|
| Client ID | the client ID from step 2 |
| Client secret | the client secret from step 2 |
| Base URL (issuer) | your Okta domain, for example https://your-company.okta.com, then click Discover endpoints |
Under Behavior:
- Choose who may sign in, for example Auto provision on with your organization. With the group assignment from step 1, Allowed email domains, for example
your-company.com, is usually enough. - If you added the groups claim in step 3, add the scope
groupsunder Additional scopes and the required claimgroupswith the valuesolidtime-users. Without the scope, Okta doesn't send the claim.
Save, then test and activate the provider as described in Test and activate.
Okta specifics
- Custom authorization servers: with the Okta API Access Management feature, you can use a custom authorization server instead, for example the issuer
https://your-company.okta.com/oauth2/default. Its keys and claims are separate: add thegroupsclaim under Security → API → Authorization Servers → default → Claims instead of on the app. - Custom domains: if your Okta org uses a custom domain (
login.your-company.com), Okta keeps issuing tokens for the org authorization server with the Okta URL until you choose the custom domain as Issuer in the app's OpenID Connect ID token settings. Use the same URL in solidtime: the issuer must match theissclaim exactly. - Client authentication: if every sign-in fails with a configuration problem although the client secret is correct, the Okta app may only accept the secret in a Basic header. Set Token endpoint authentication in solidtime to
client_secret_basic. - Verified emails: with the org authorization server, Okta leaves
email_verifiedout of the ID token and sends it only from the userinfo endpoint; solidtime reads it from there. Keep Trust email without "email_verified" off. - Sign-in policy: Okta applies the app's authentication policy (for example, two factors) on every sign-in to solidtime.
- Deactivated users can't sign in at Okta, so they can't sign in to solidtime either. Existing sessions and API tokens remain; see Removing users.