Keycloak
This guide connects solidtime to a Keycloak realm. The screenshots show Keycloak 26; older versions have the same settings in slightly different places.
You need:
- A Keycloak realm with your users. In this guide the realm is called
companyand Keycloak runs athttps://keycloak.your-company.com. - The callback URL of your solidtime provider. Create the provider in solidtime first with the key
keycloak(see Adding an identity provider); the callback URL is thenhttps://time.your-company.com/sso/keycloak/callback.
1. Create the client
In the Keycloak admin console, select your realm and go to Clients → Create client.
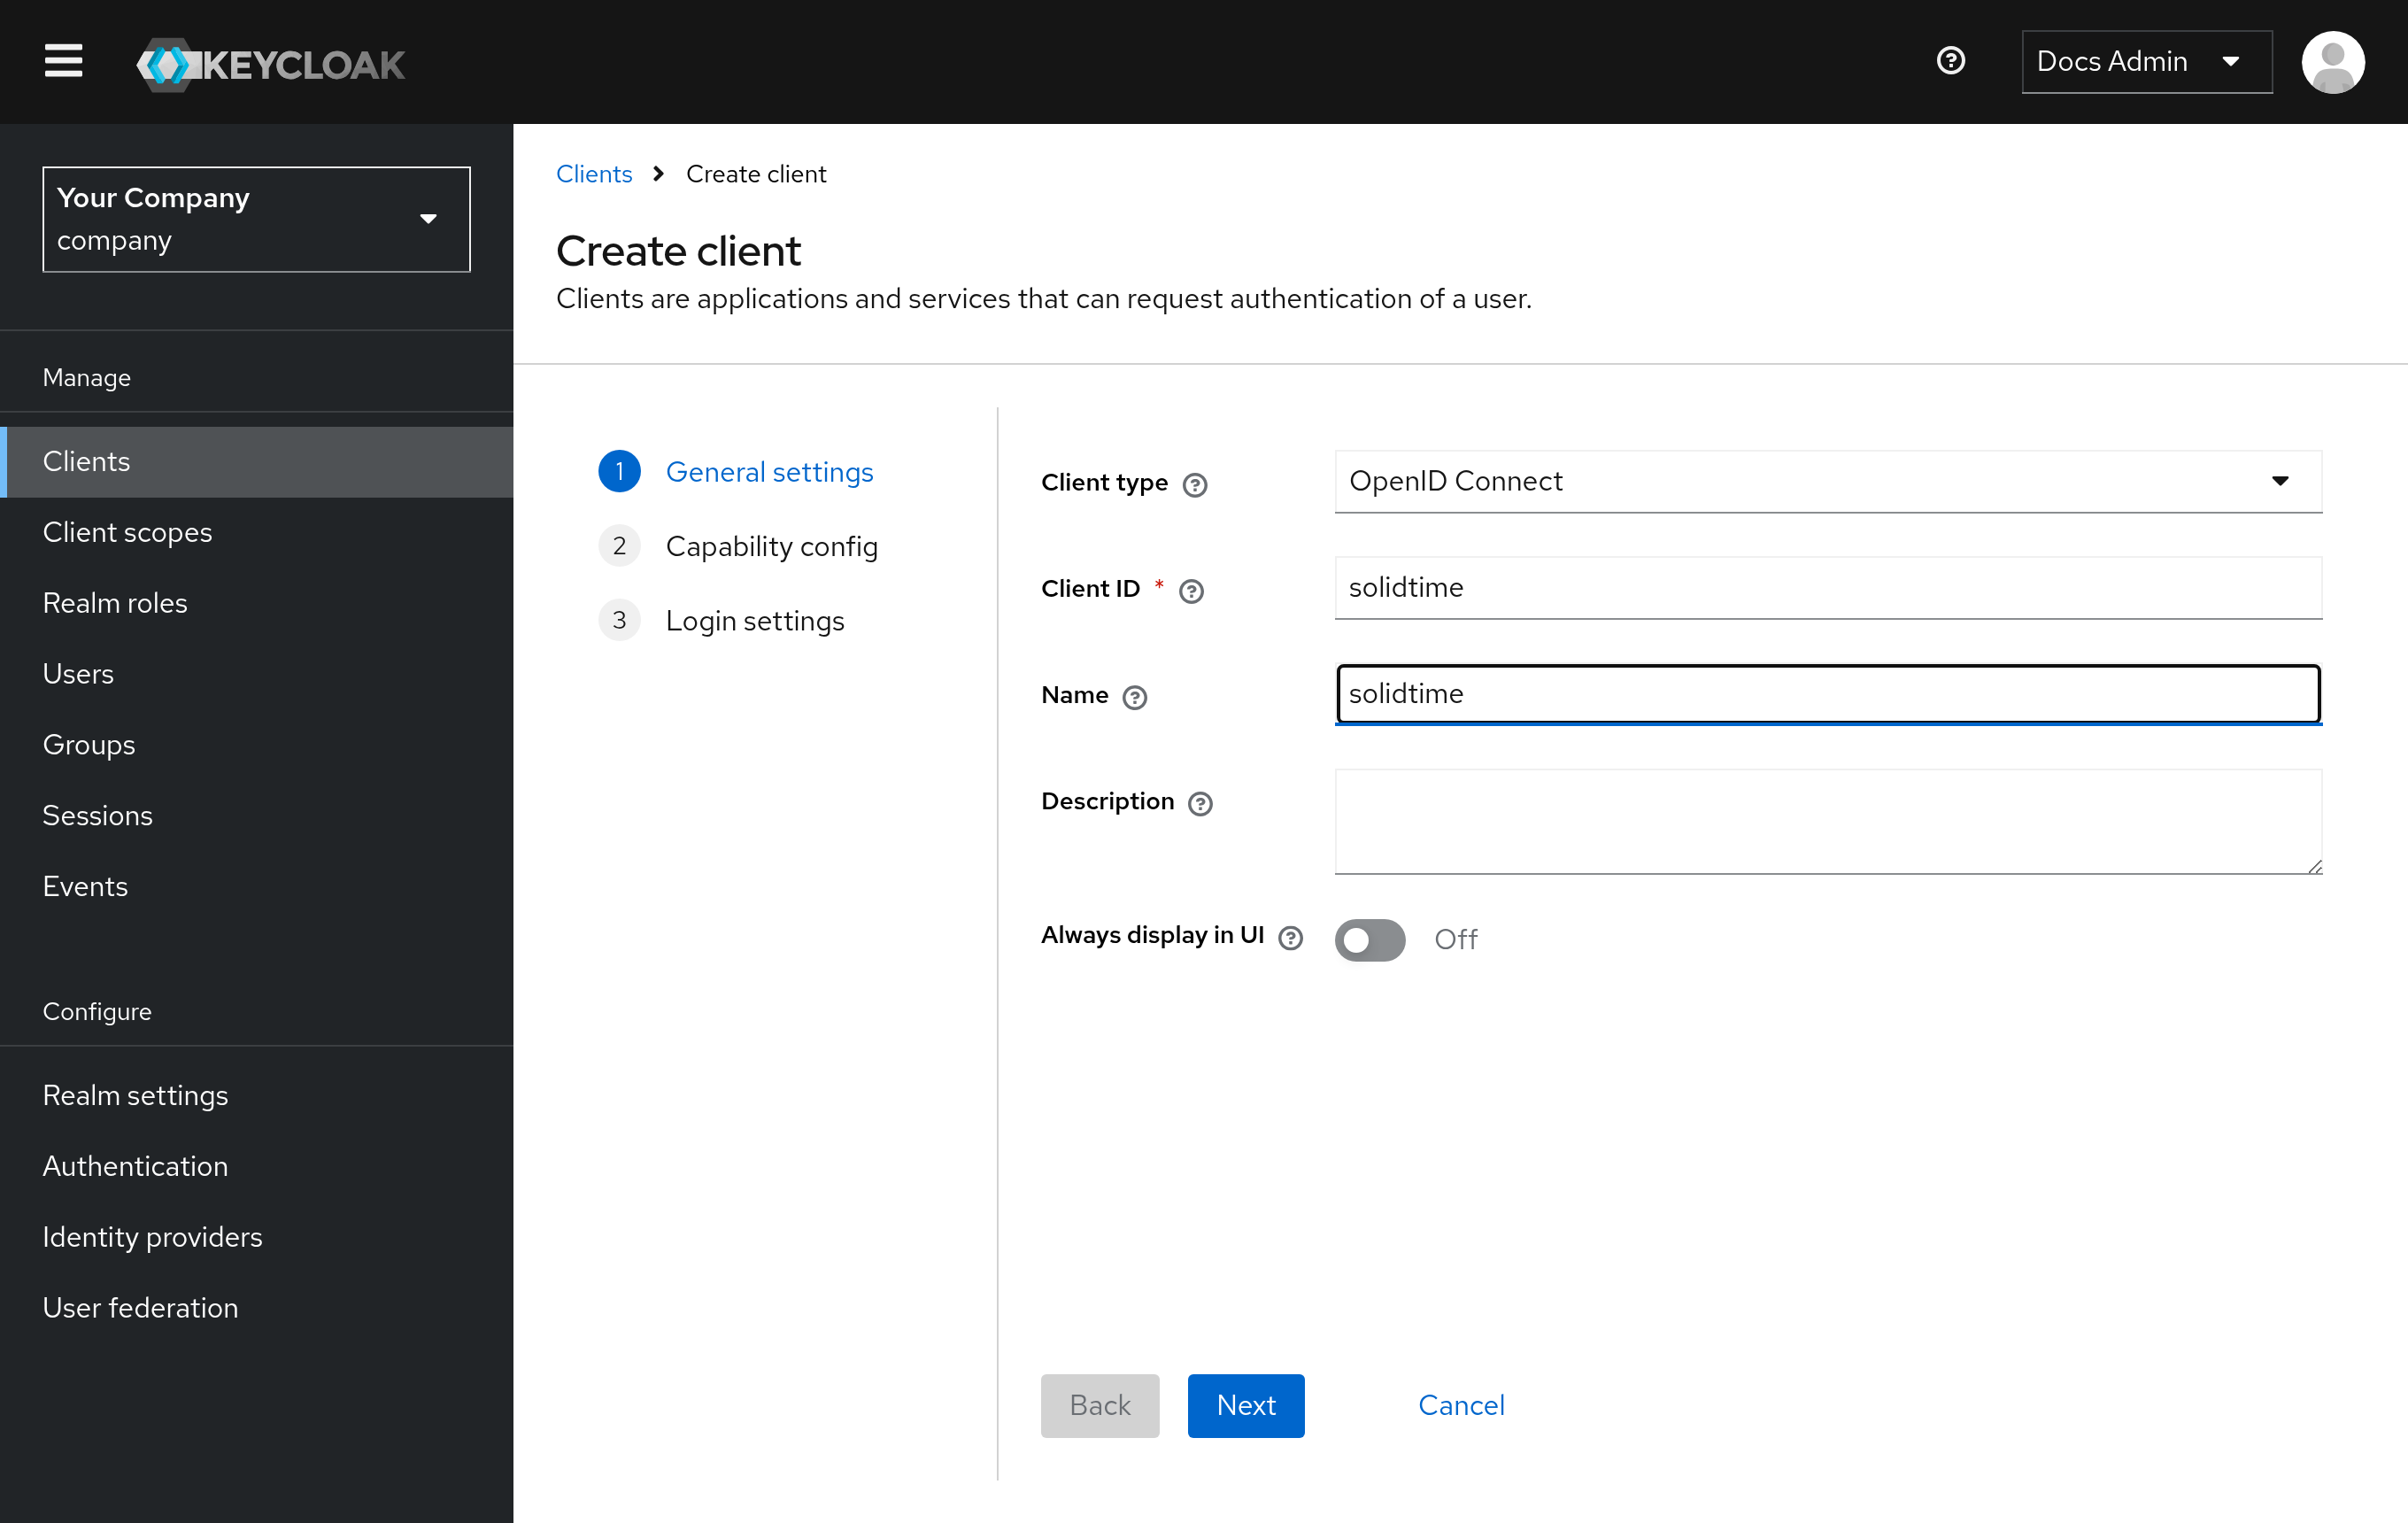
General settings: keep Client type OpenID Connect and enter a Client ID, for example solidtime. The name is optional.
Capability config:
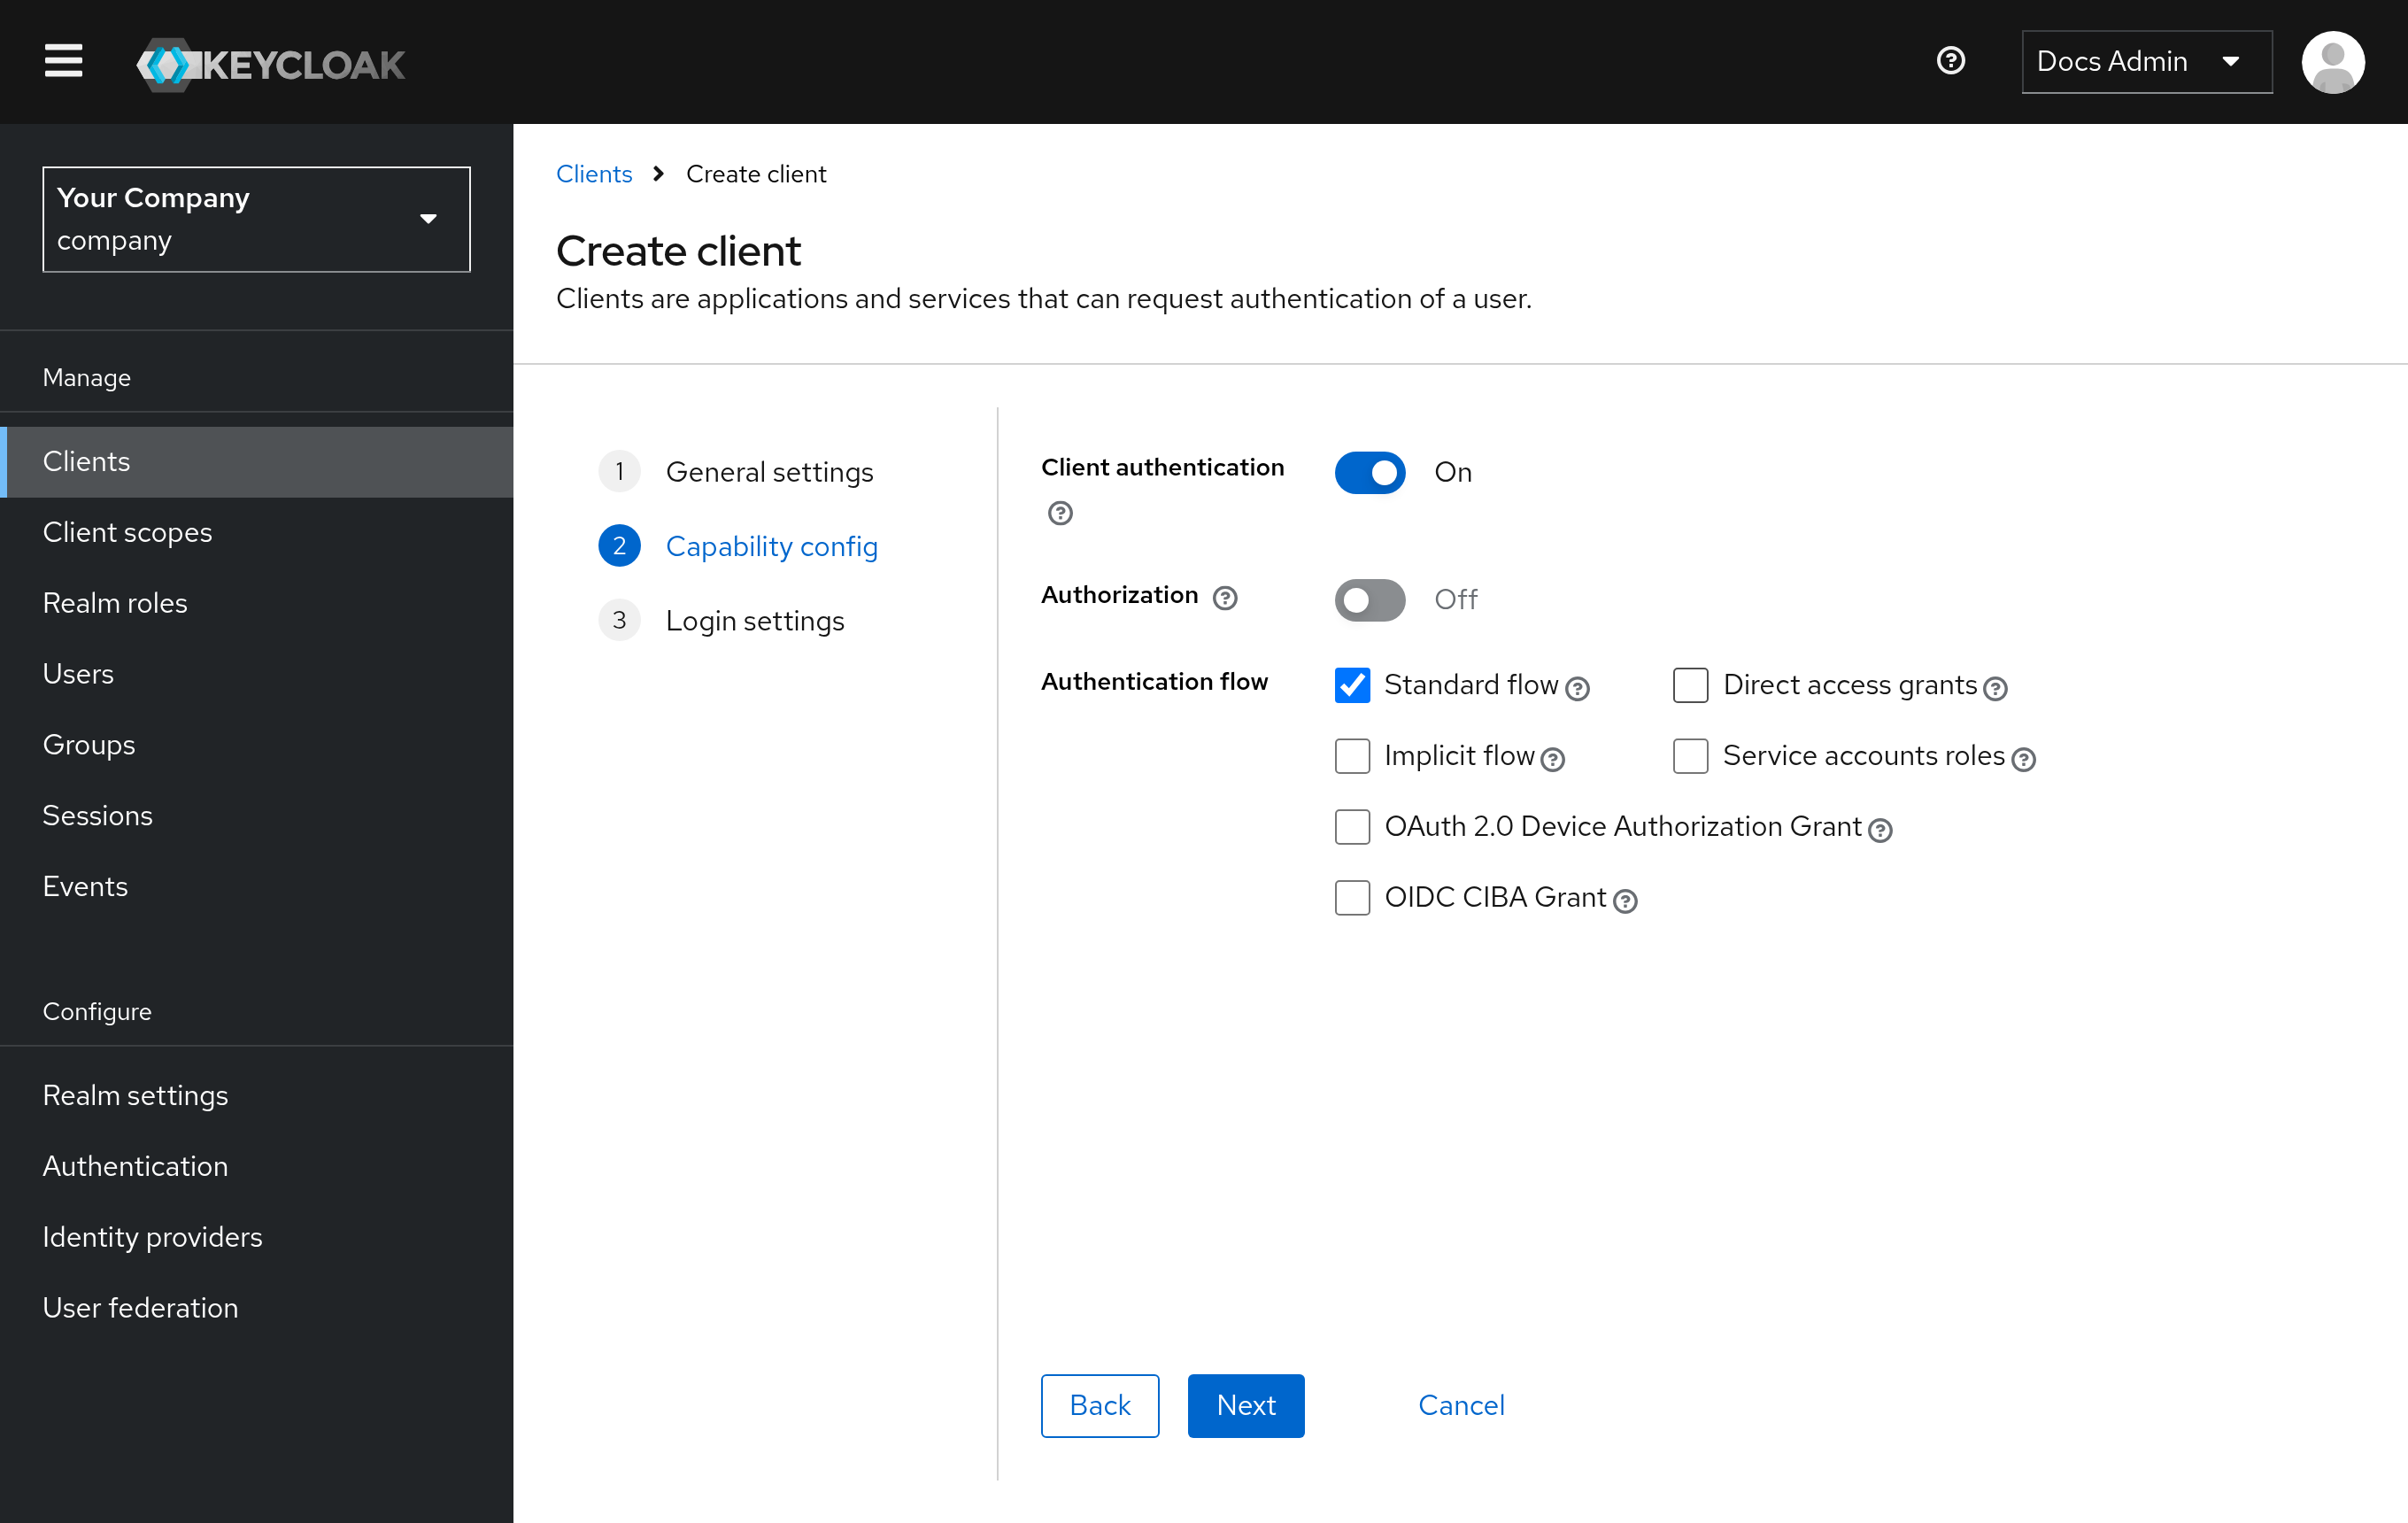
- Turn on Client authentication. This makes the client confidential and gives it a client secret.
- Keep Standard flow checked. This is the authorization code flow solidtime uses.
- Uncheck Direct access grants; solidtime doesn't need it.
- If your Keycloak version shows PKCE Method here, set it to
S256. solidtime always sends a PKCE challenge, so this only makes Keycloak require it. In older versions the setting is under Advanced → Advanced settings → Proof Key for Code Exchange Code Challenge Method.
Login settings:
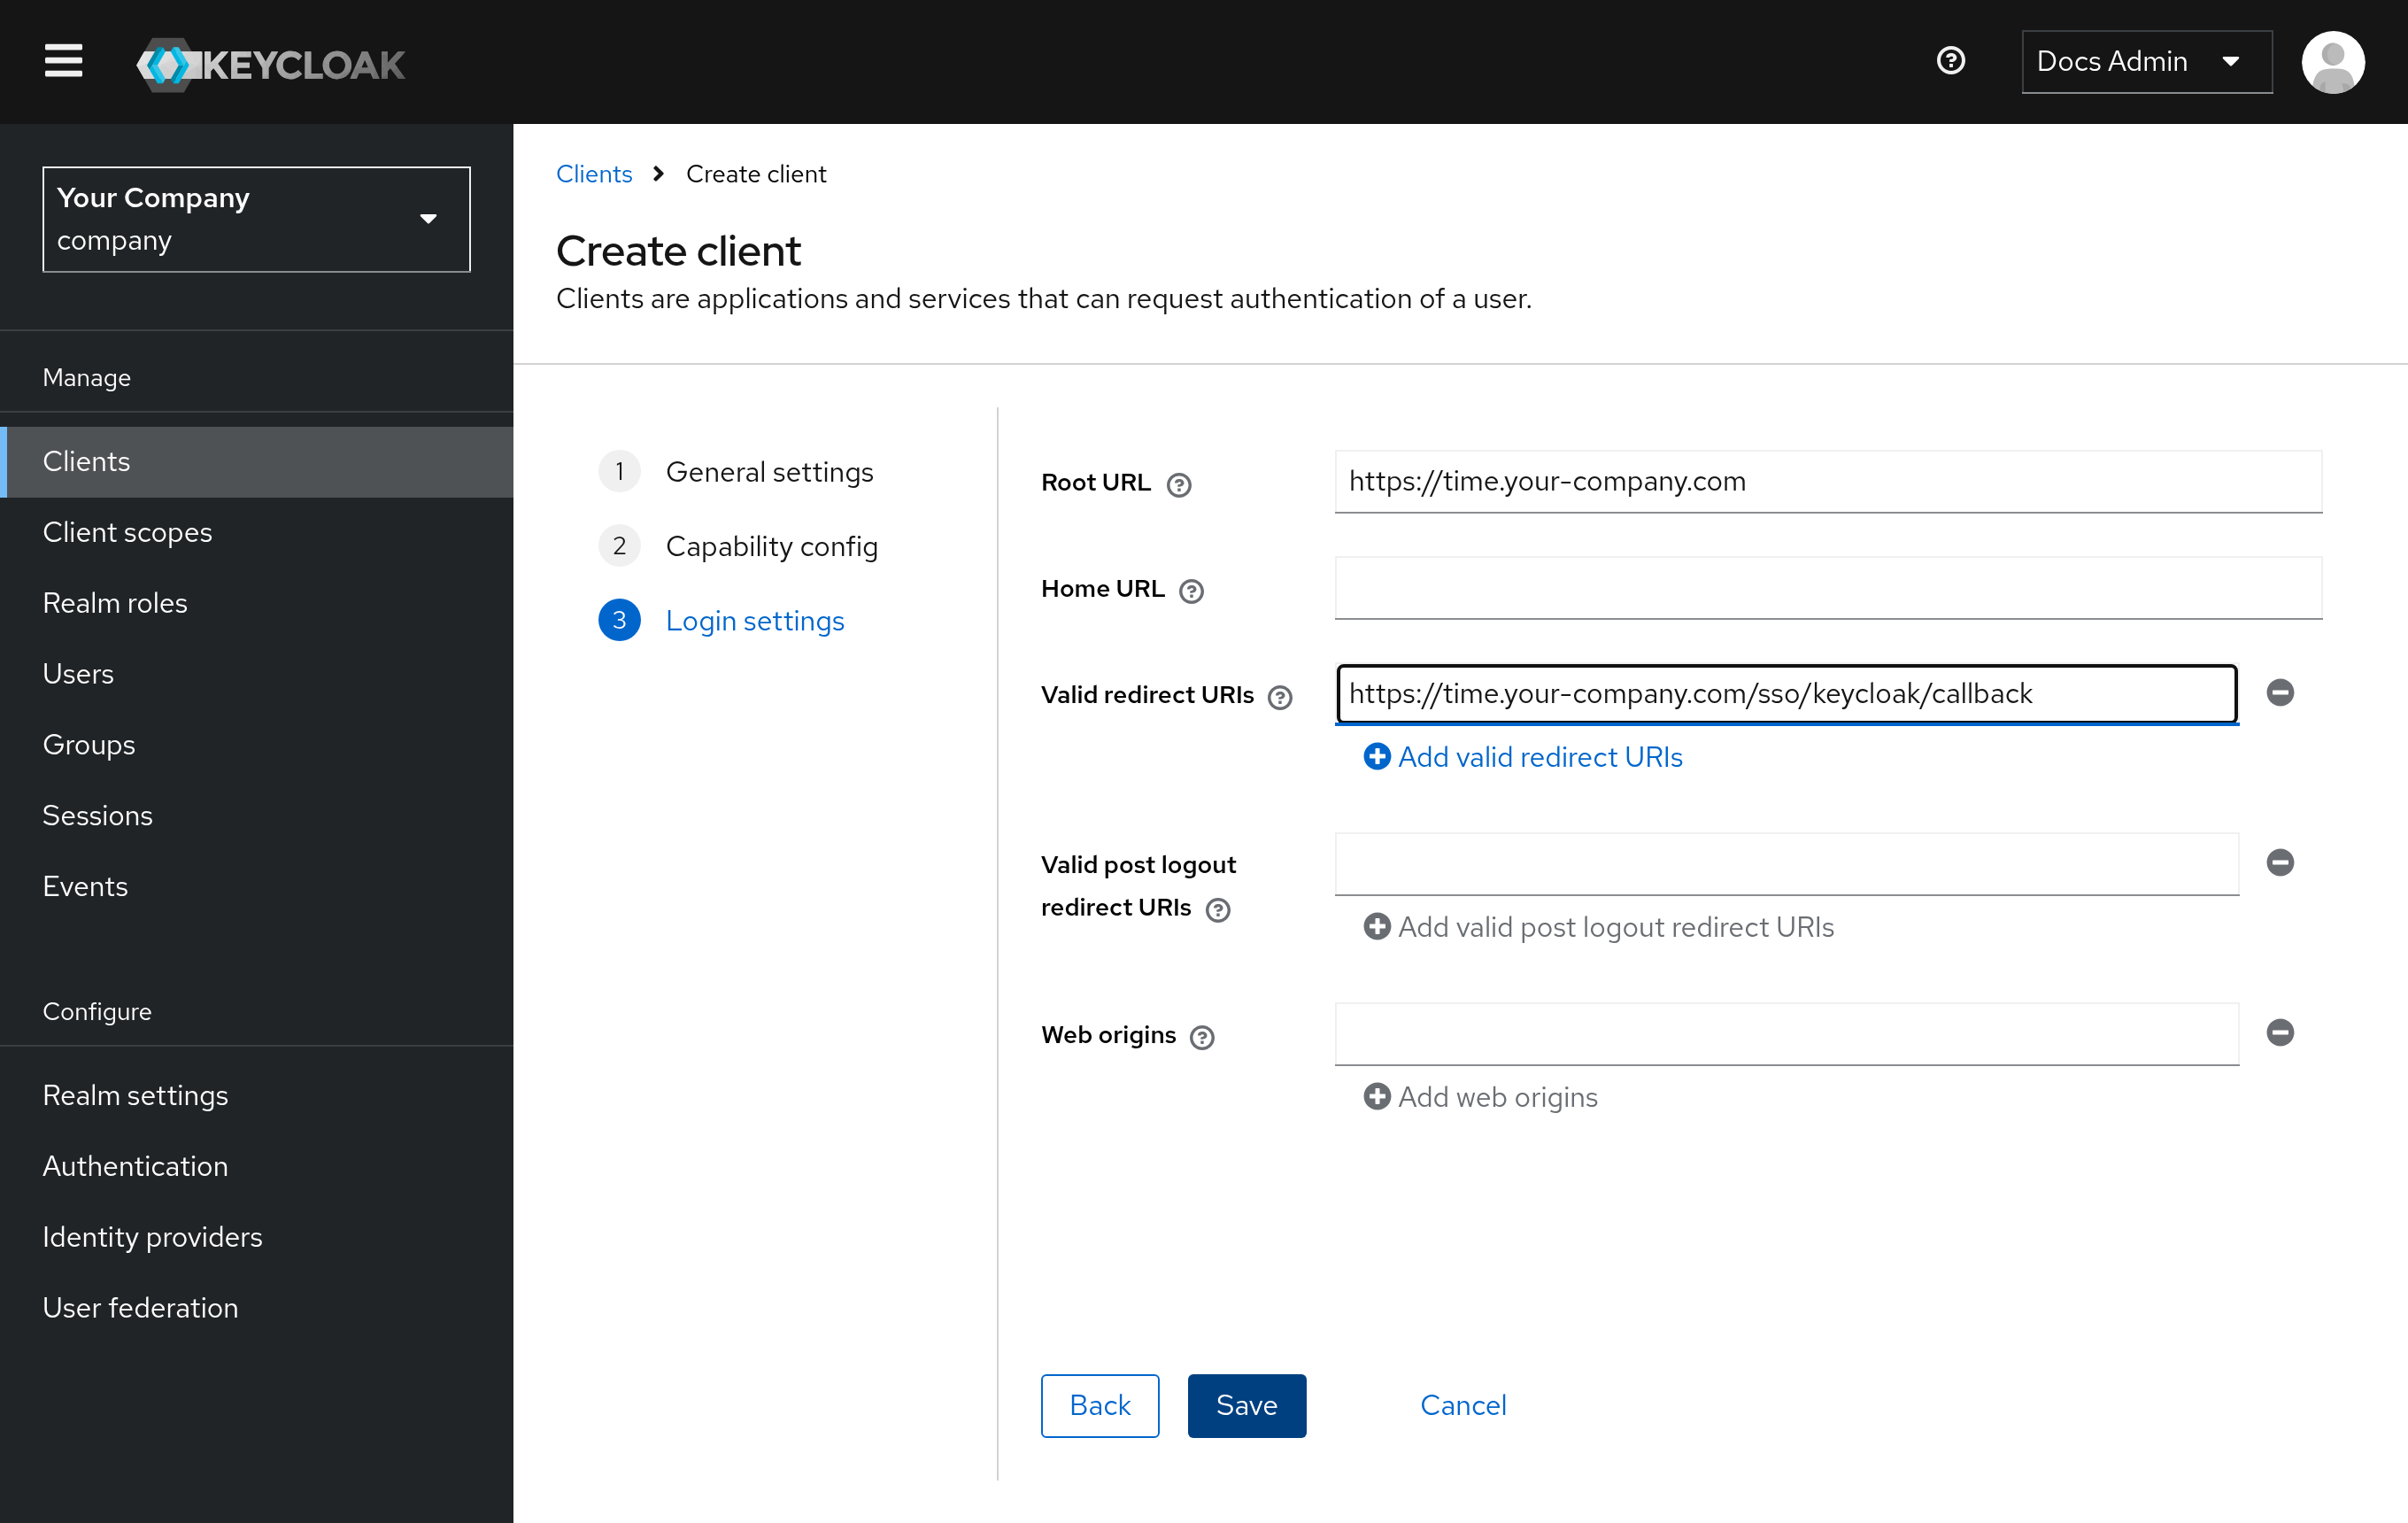
- Root URL: your solidtime URL, for example
https://time.your-company.com. - Valid redirect URIs: the Callback URL of your solidtime provider, for example
https://time.your-company.com/sso/keycloak/callback. Copy it from solidtime exactly as shown.
Click Save.
2. Copy the client secret
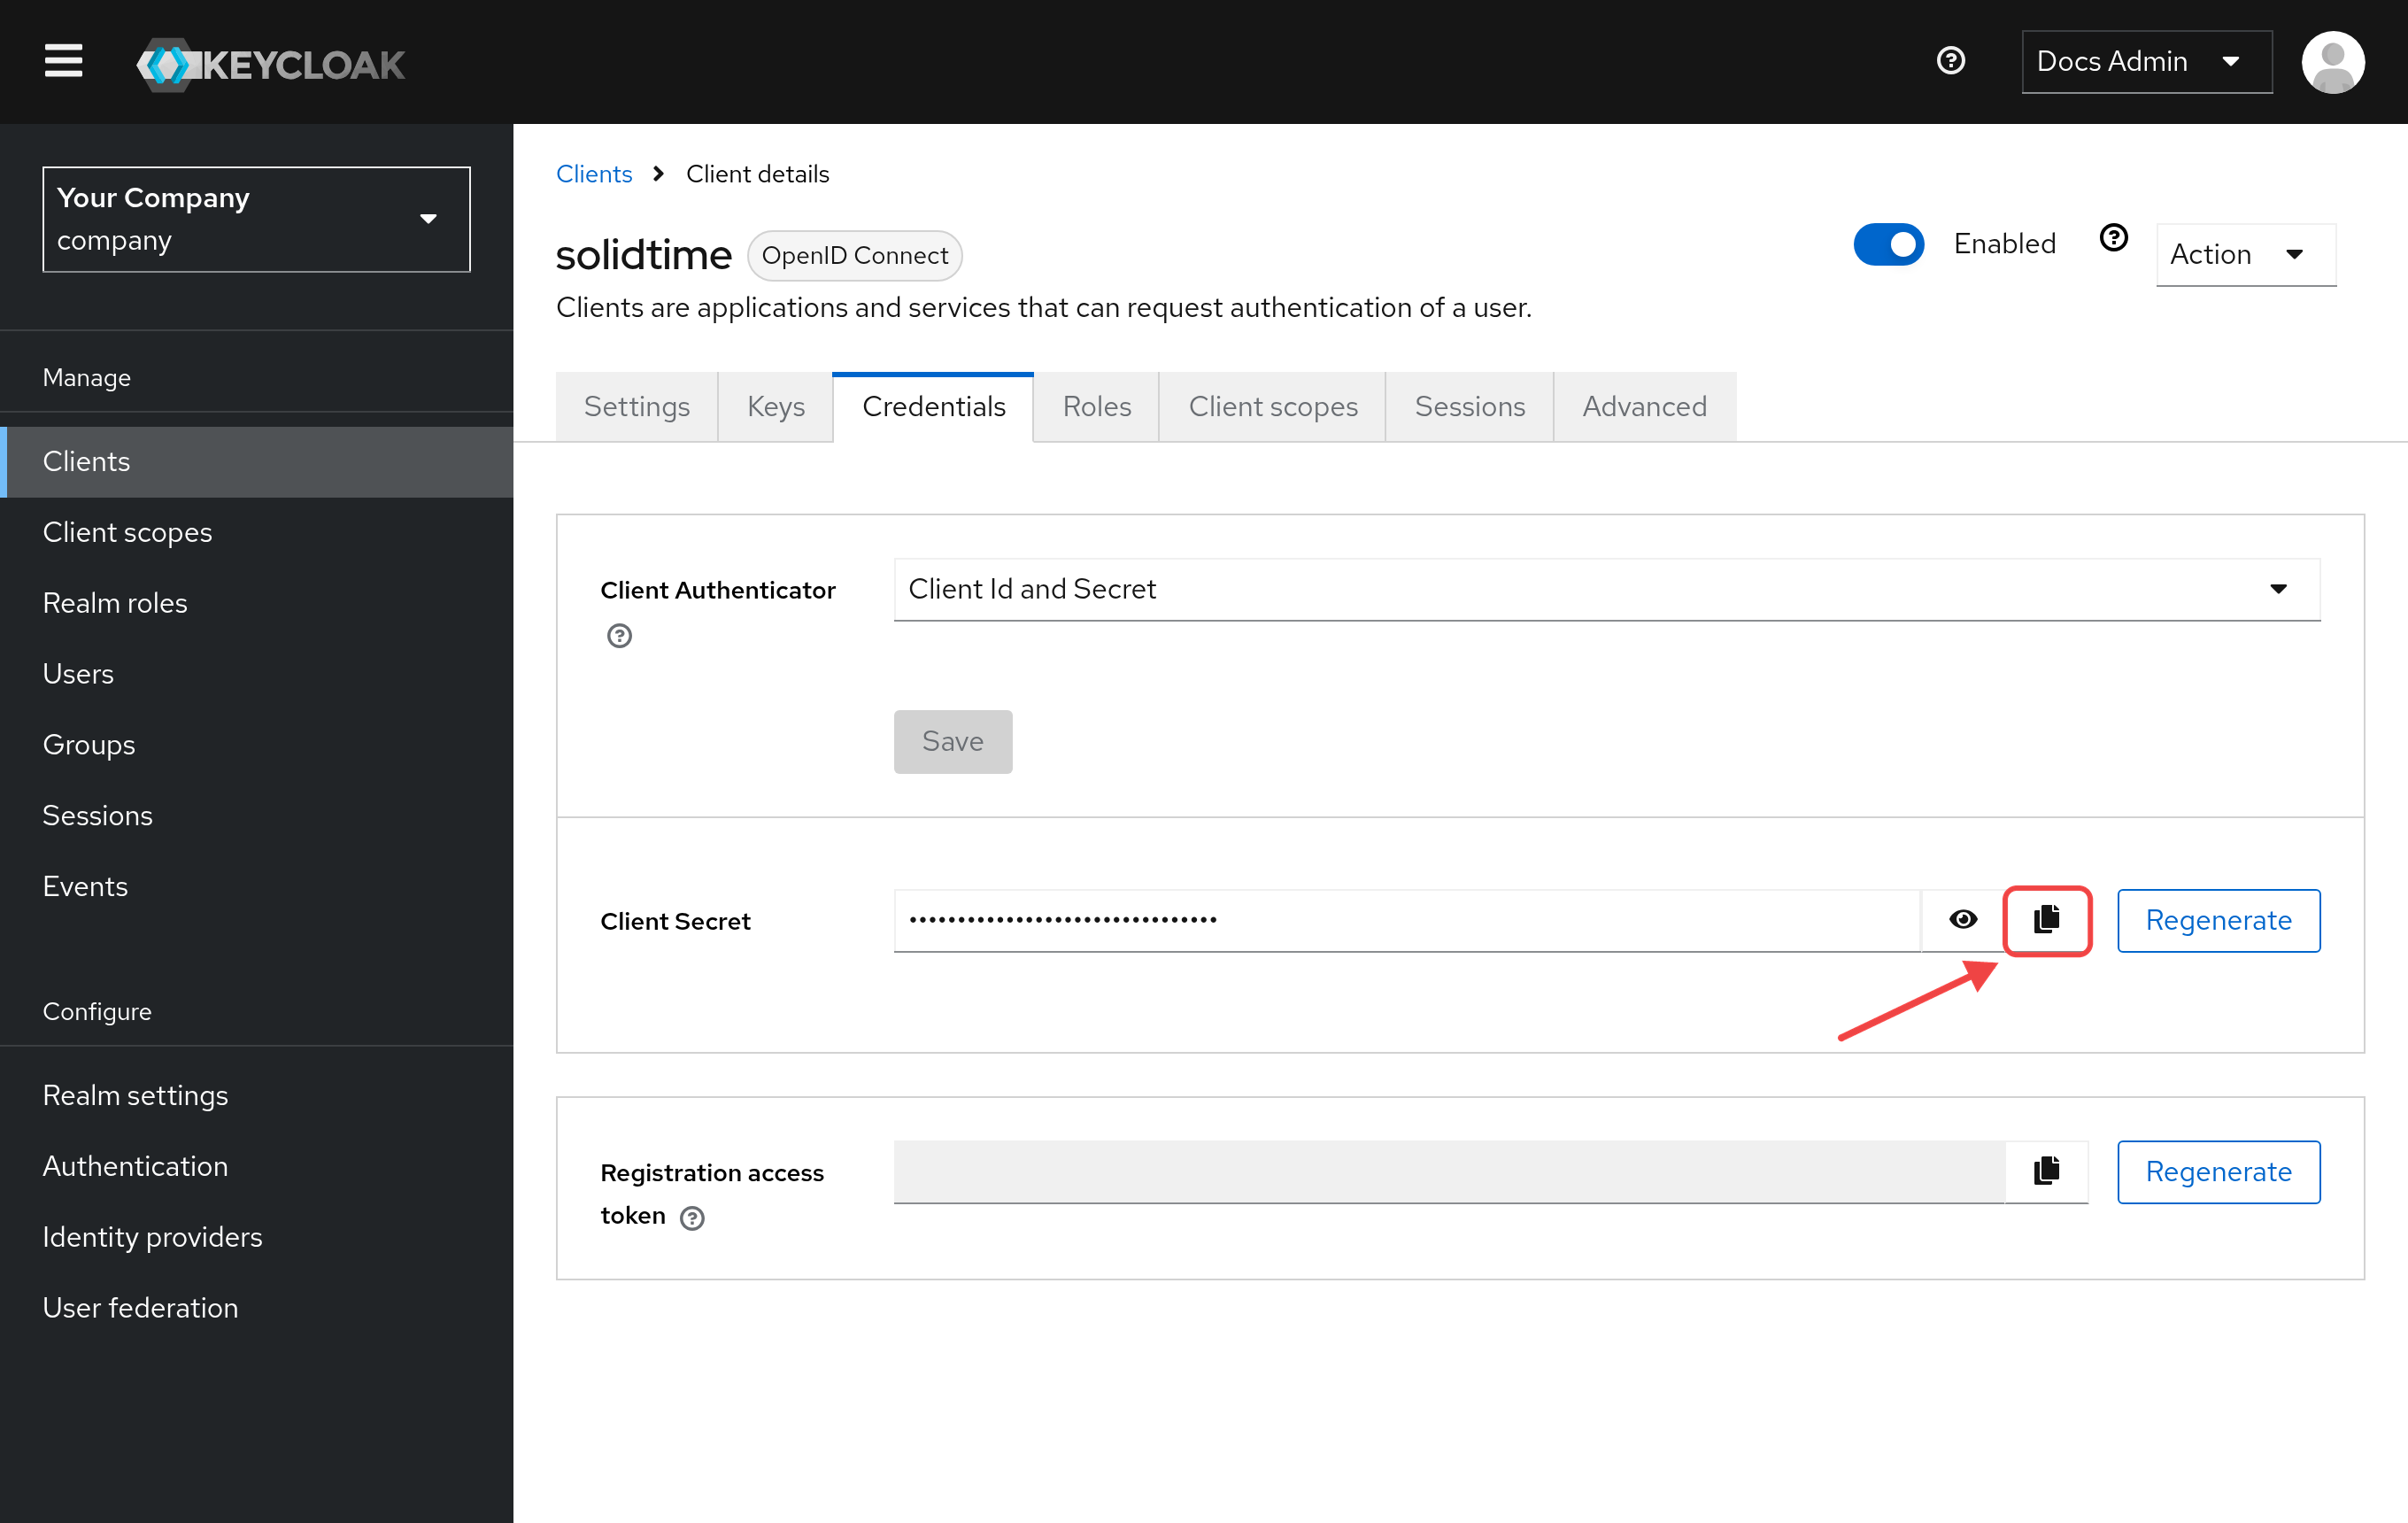
Open the Credentials tab of the client. Keep Client Authenticator at Client Id and Secret and copy the Client Secret.
3. Add a groups or roles claim (optional)
To limit solidtime to some of your Keycloak users, add their groups or realm roles to the ID token. You need only one of the two.
Groups
Add the user's groups to the token:
-
Open the client's Client scopes tab and click
solidtime-dedicated.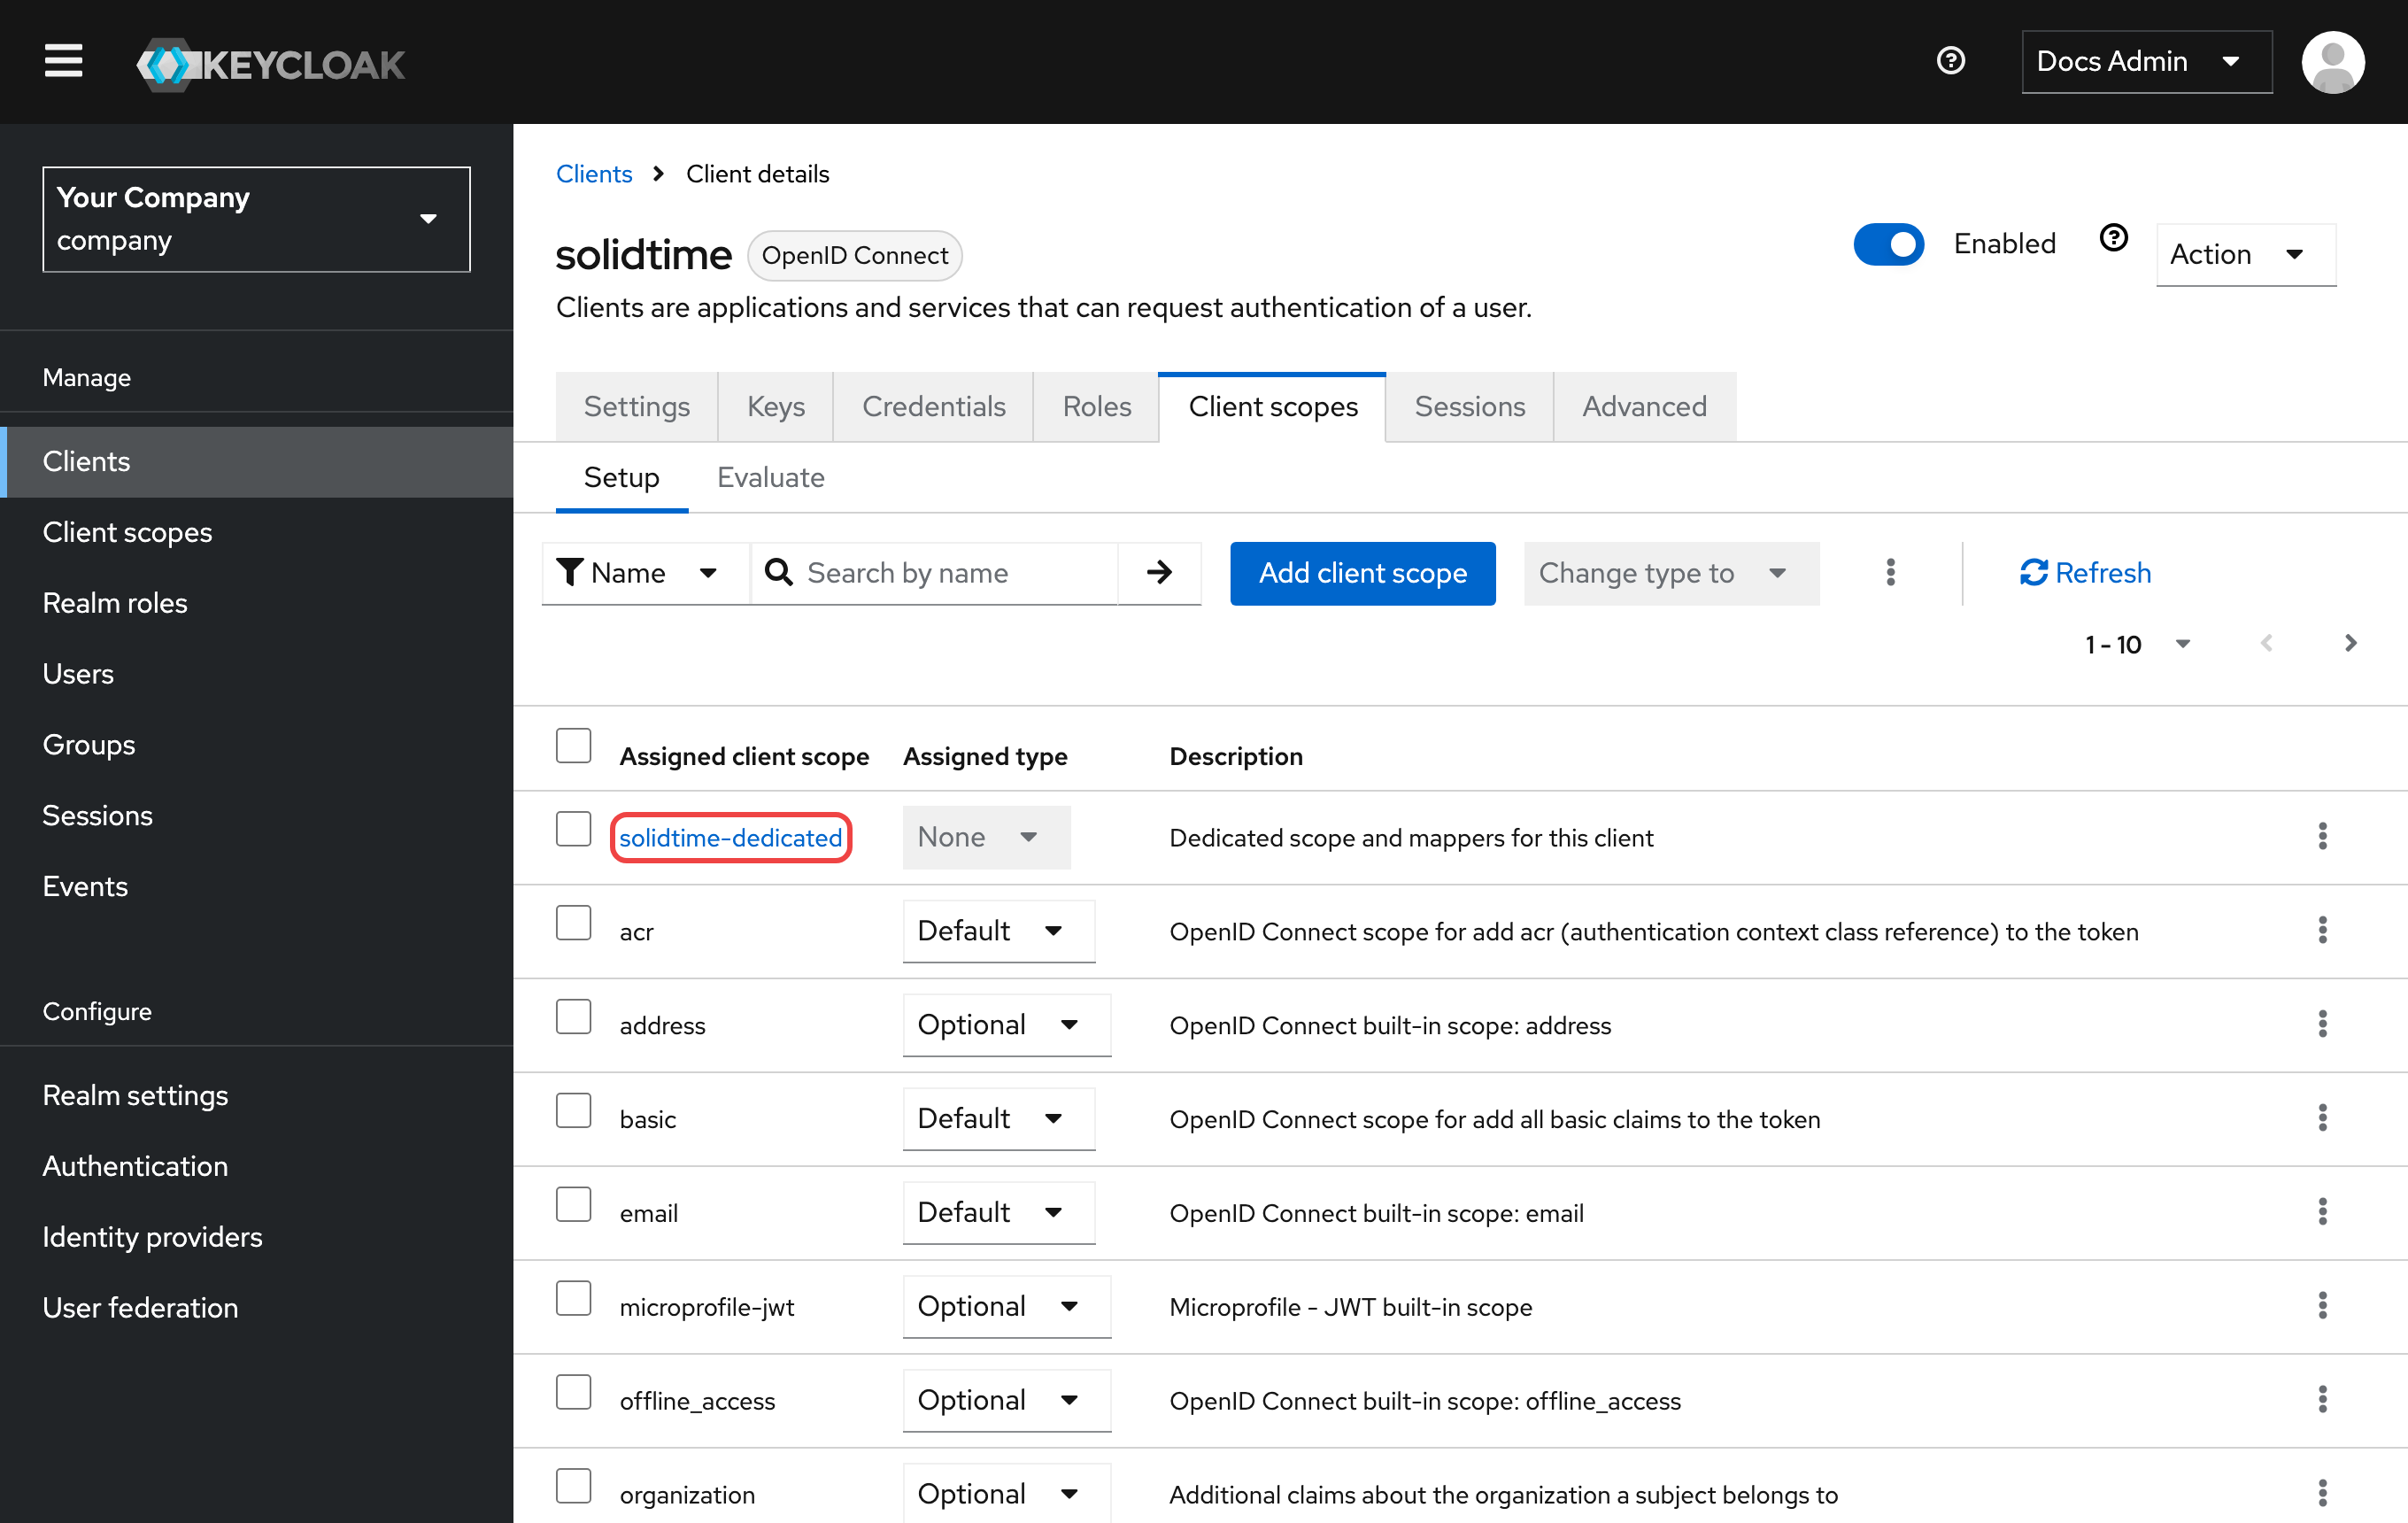
-
Click Configure a new mapper (or Add mapper → By configuration).
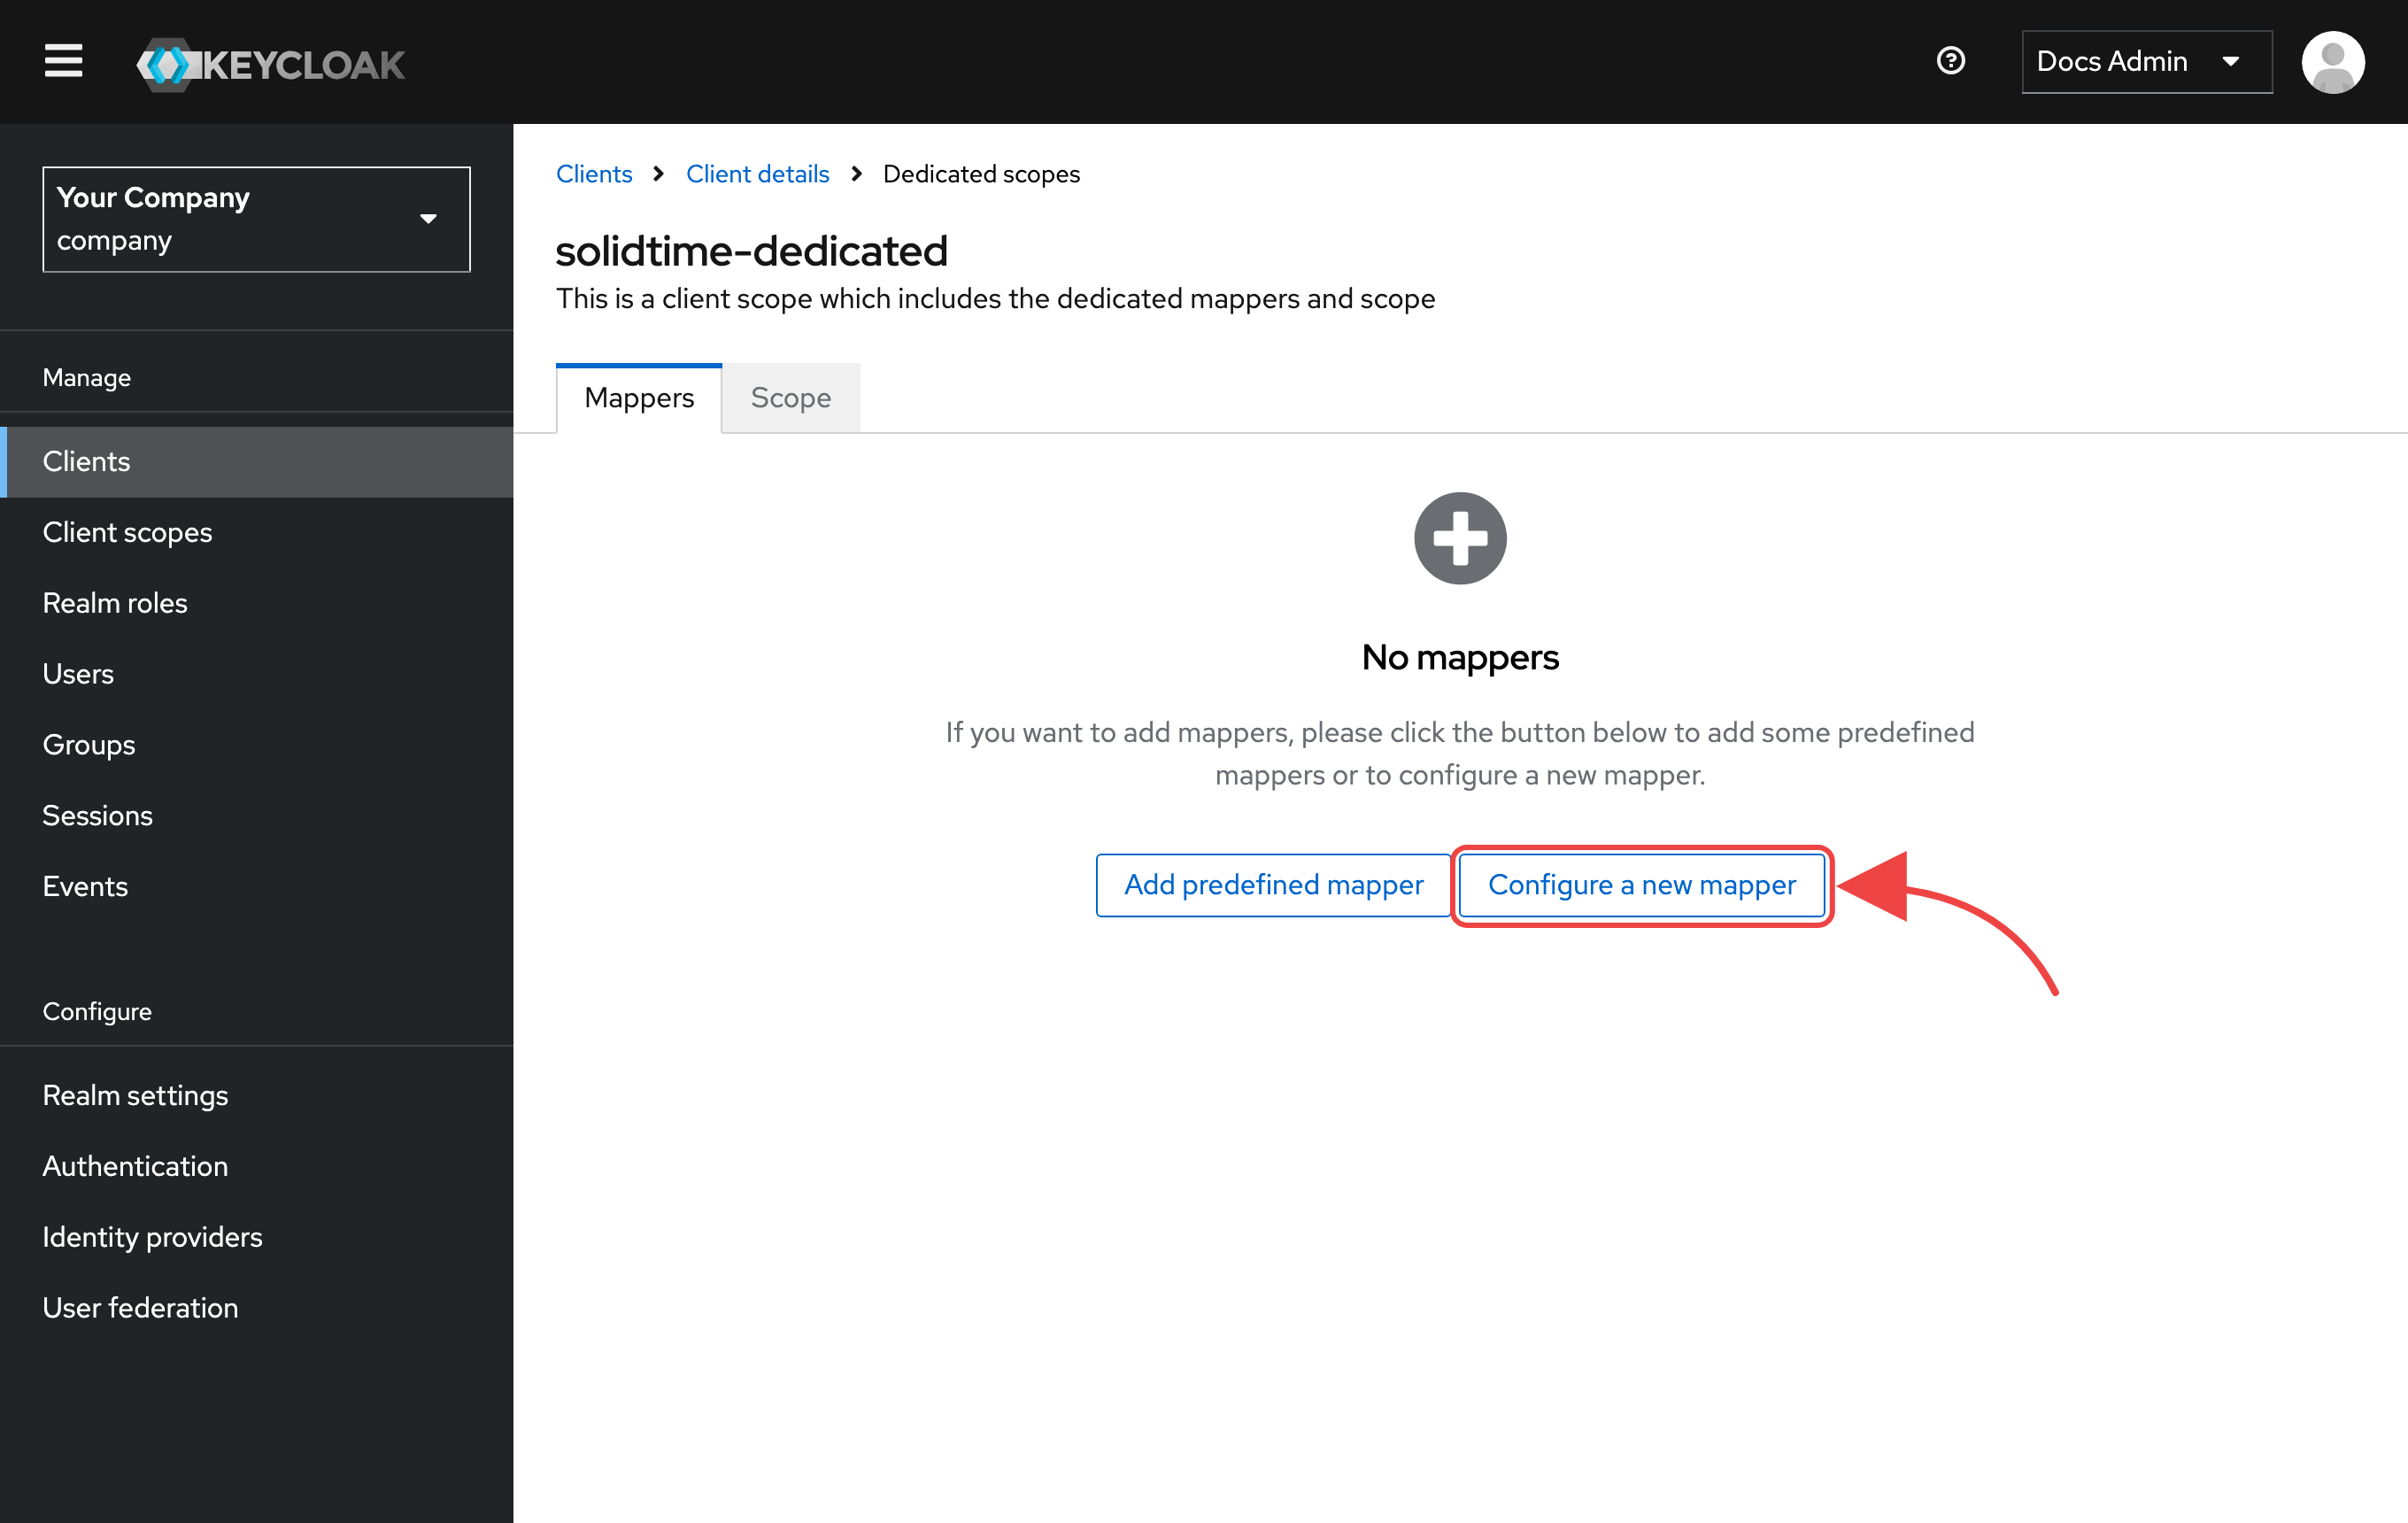
-
Choose Group Membership.
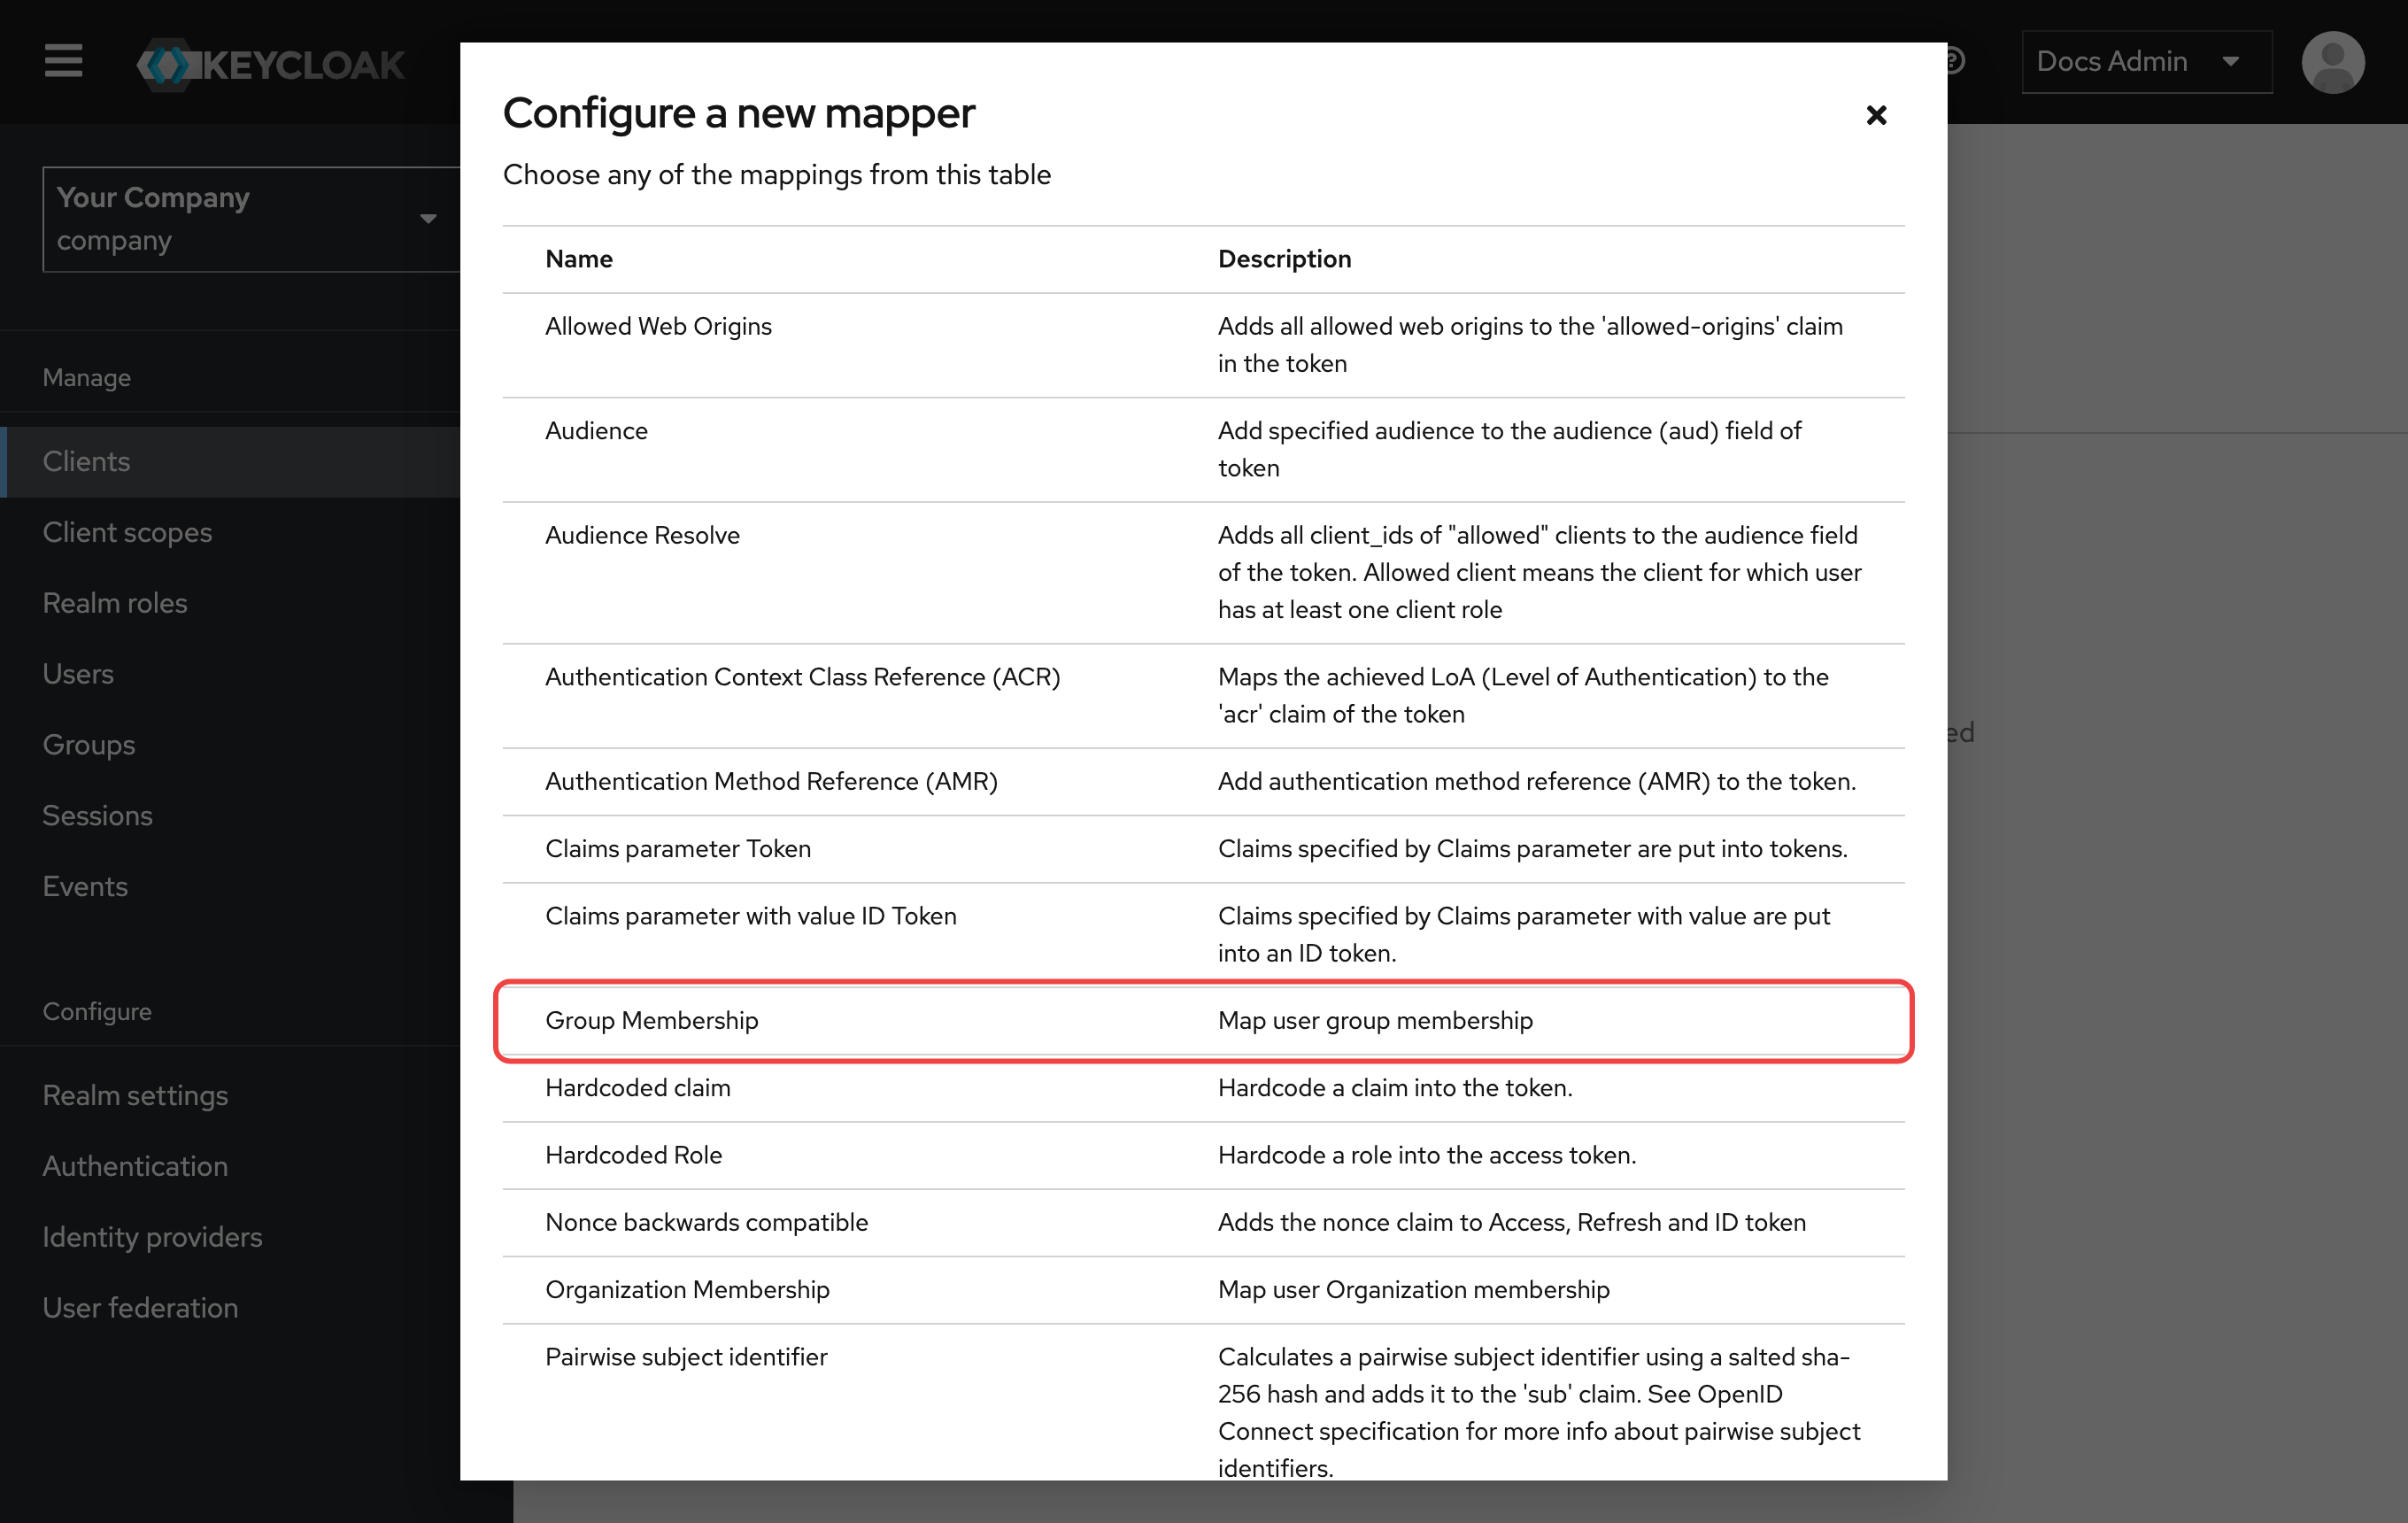
-
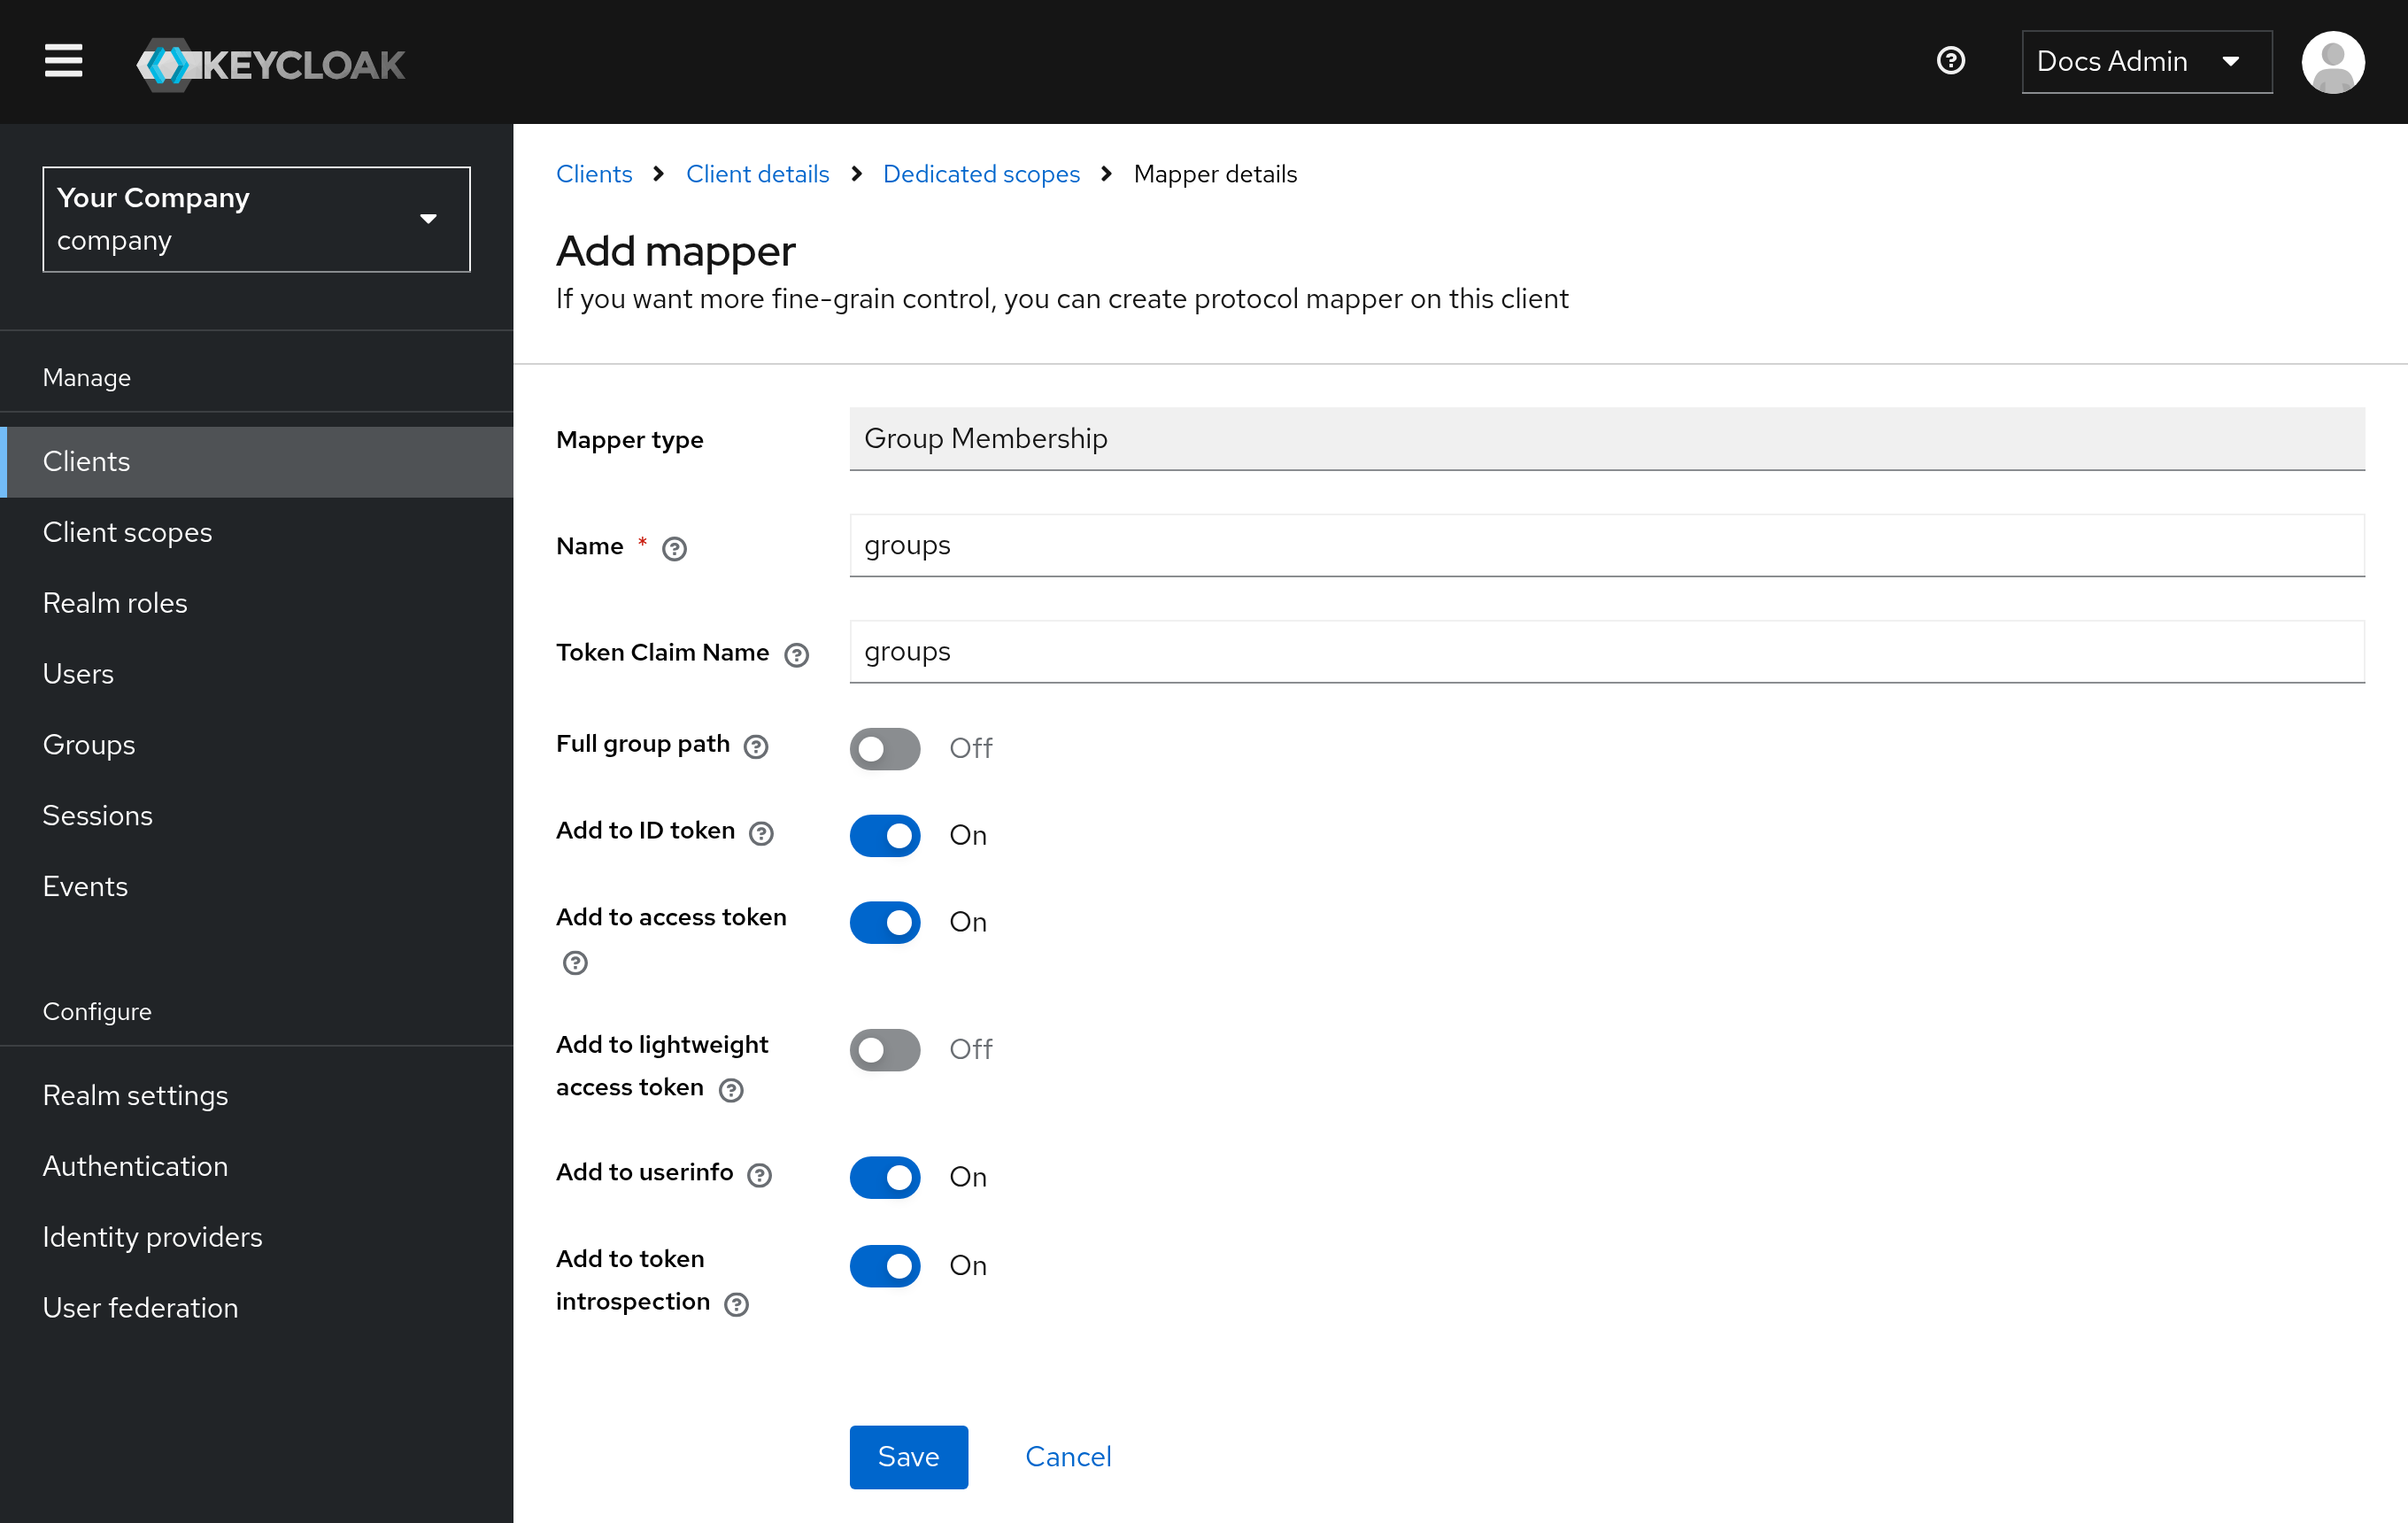
Set Name and Token Claim Name to
groups. -
Turn Full group path off, so the claim contains
solidtime-usersinstead of/solidtime-users. -
Keep Add to ID token and Add to userinfo on, and save.
Then create the group and add the users who may use solidtime:
-
Under Groups, click Create group, enter a name such as
solidtime-users, and click Create.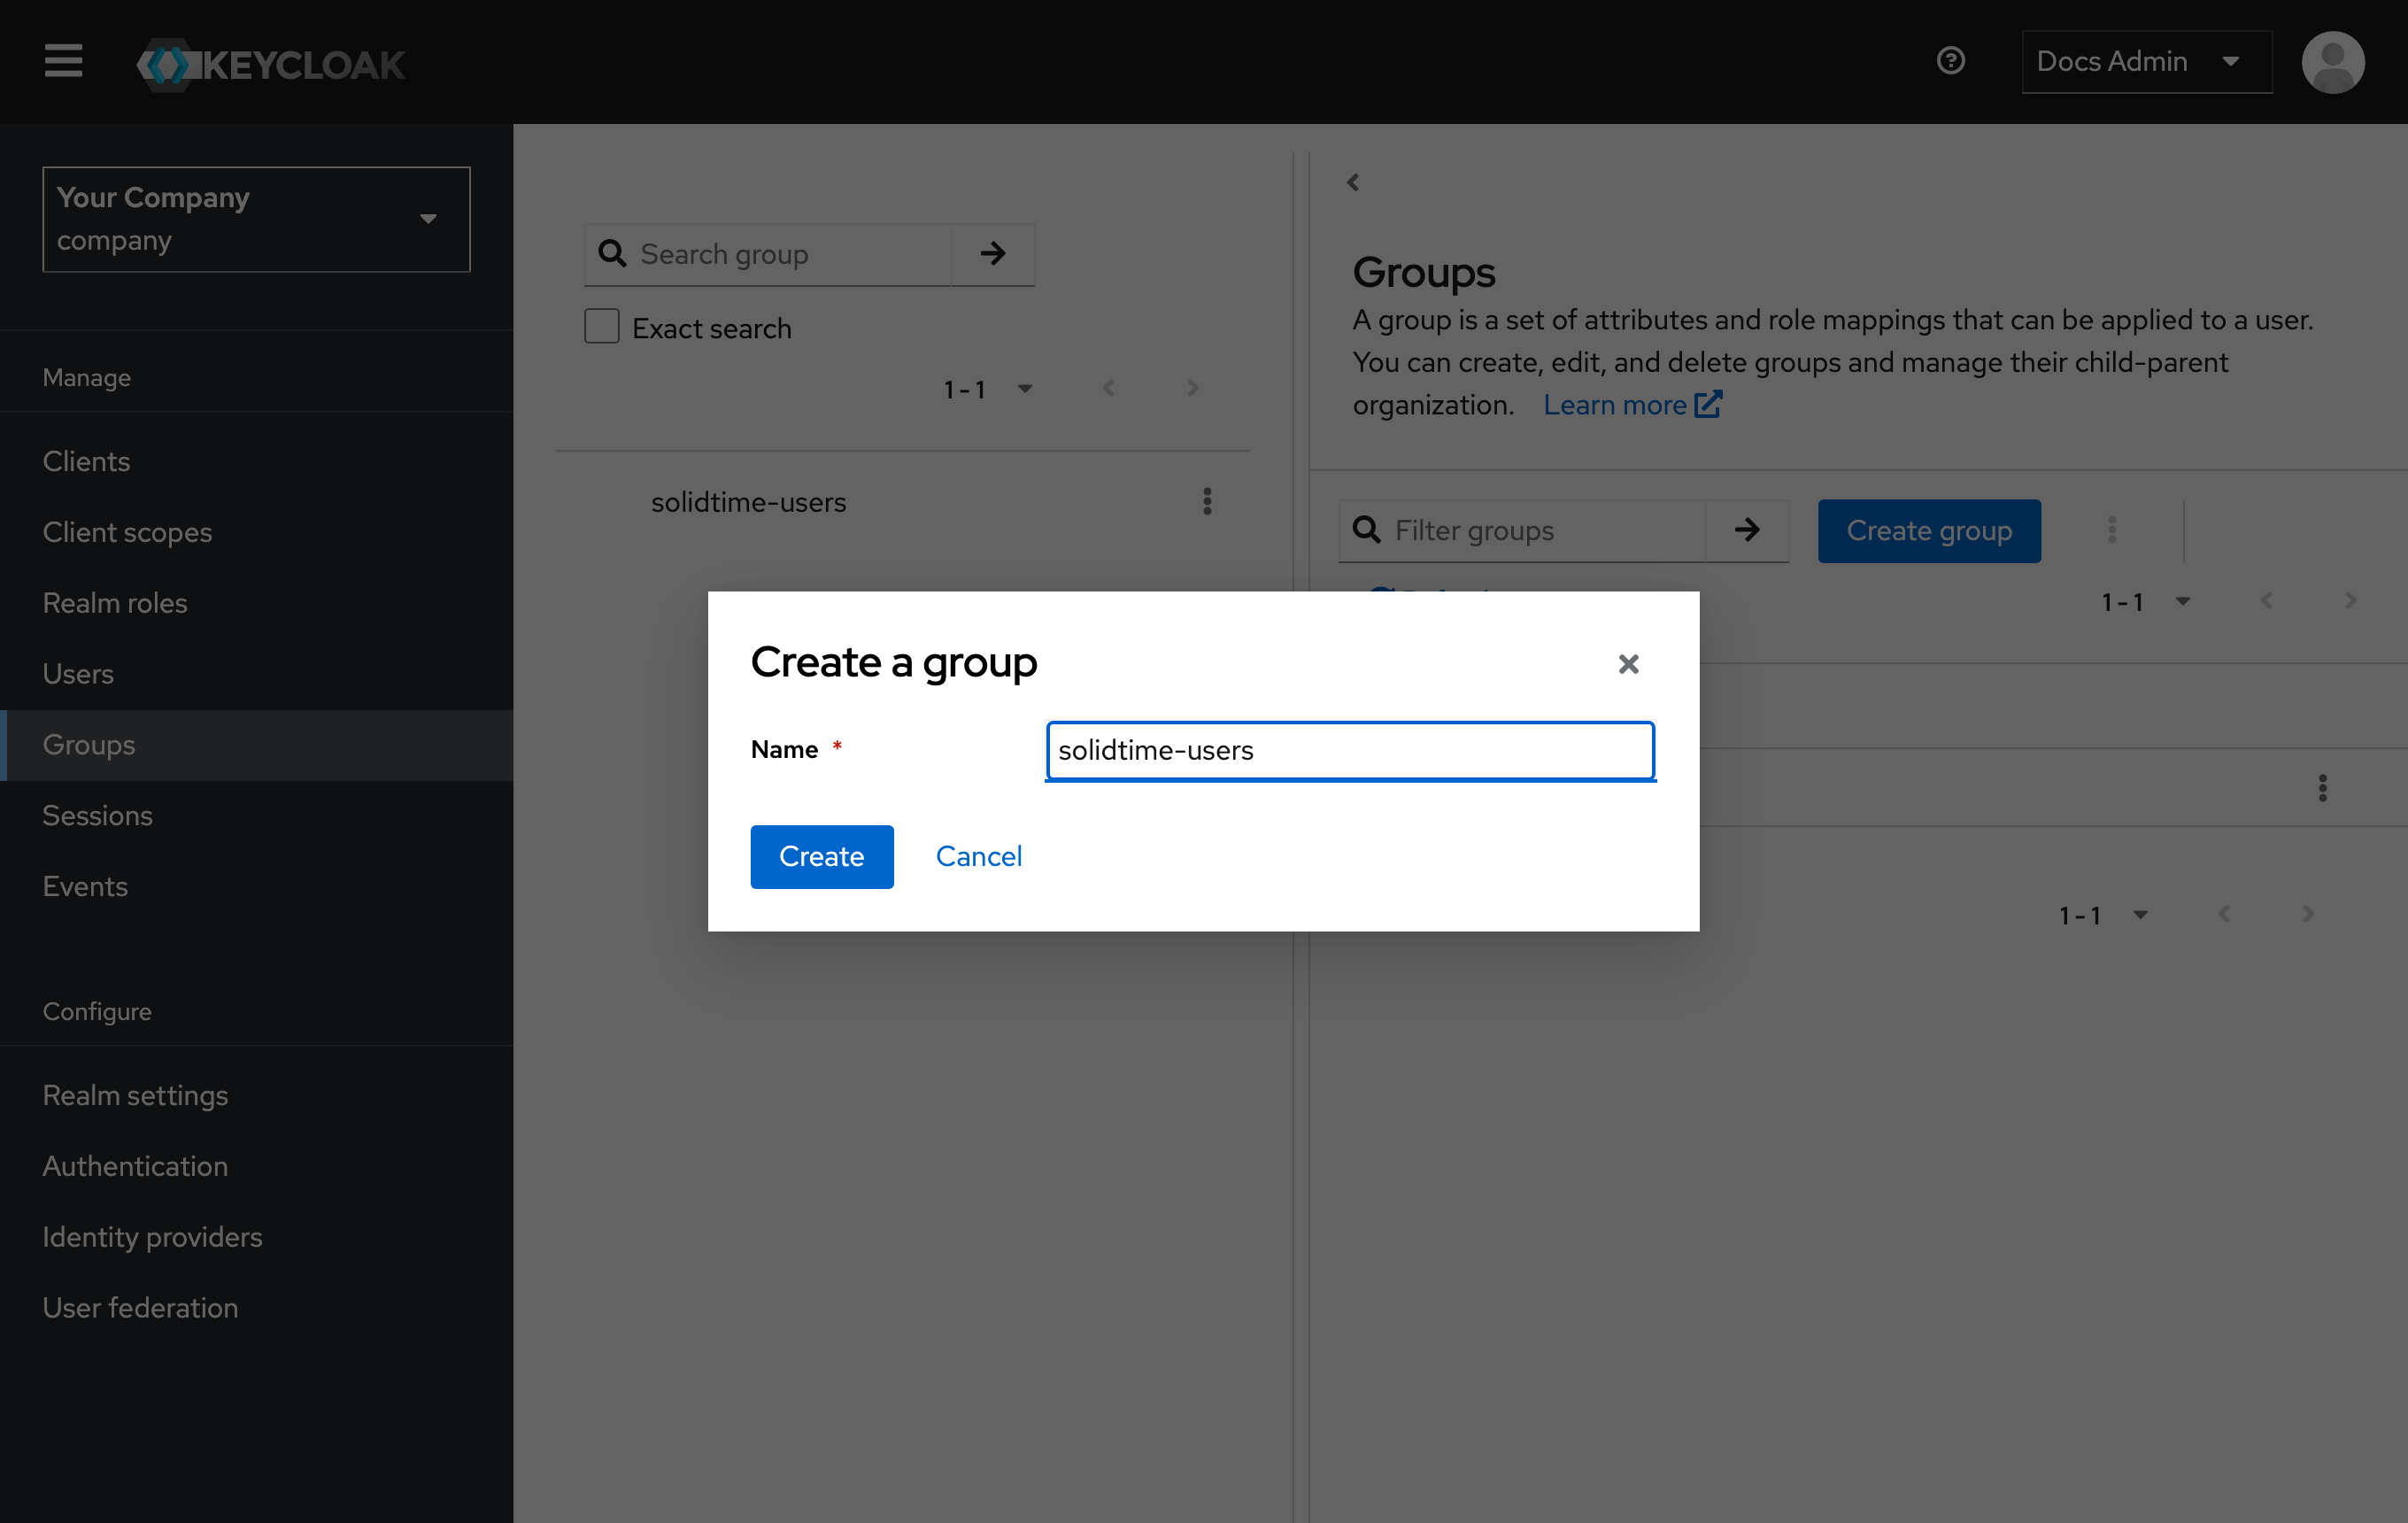
-
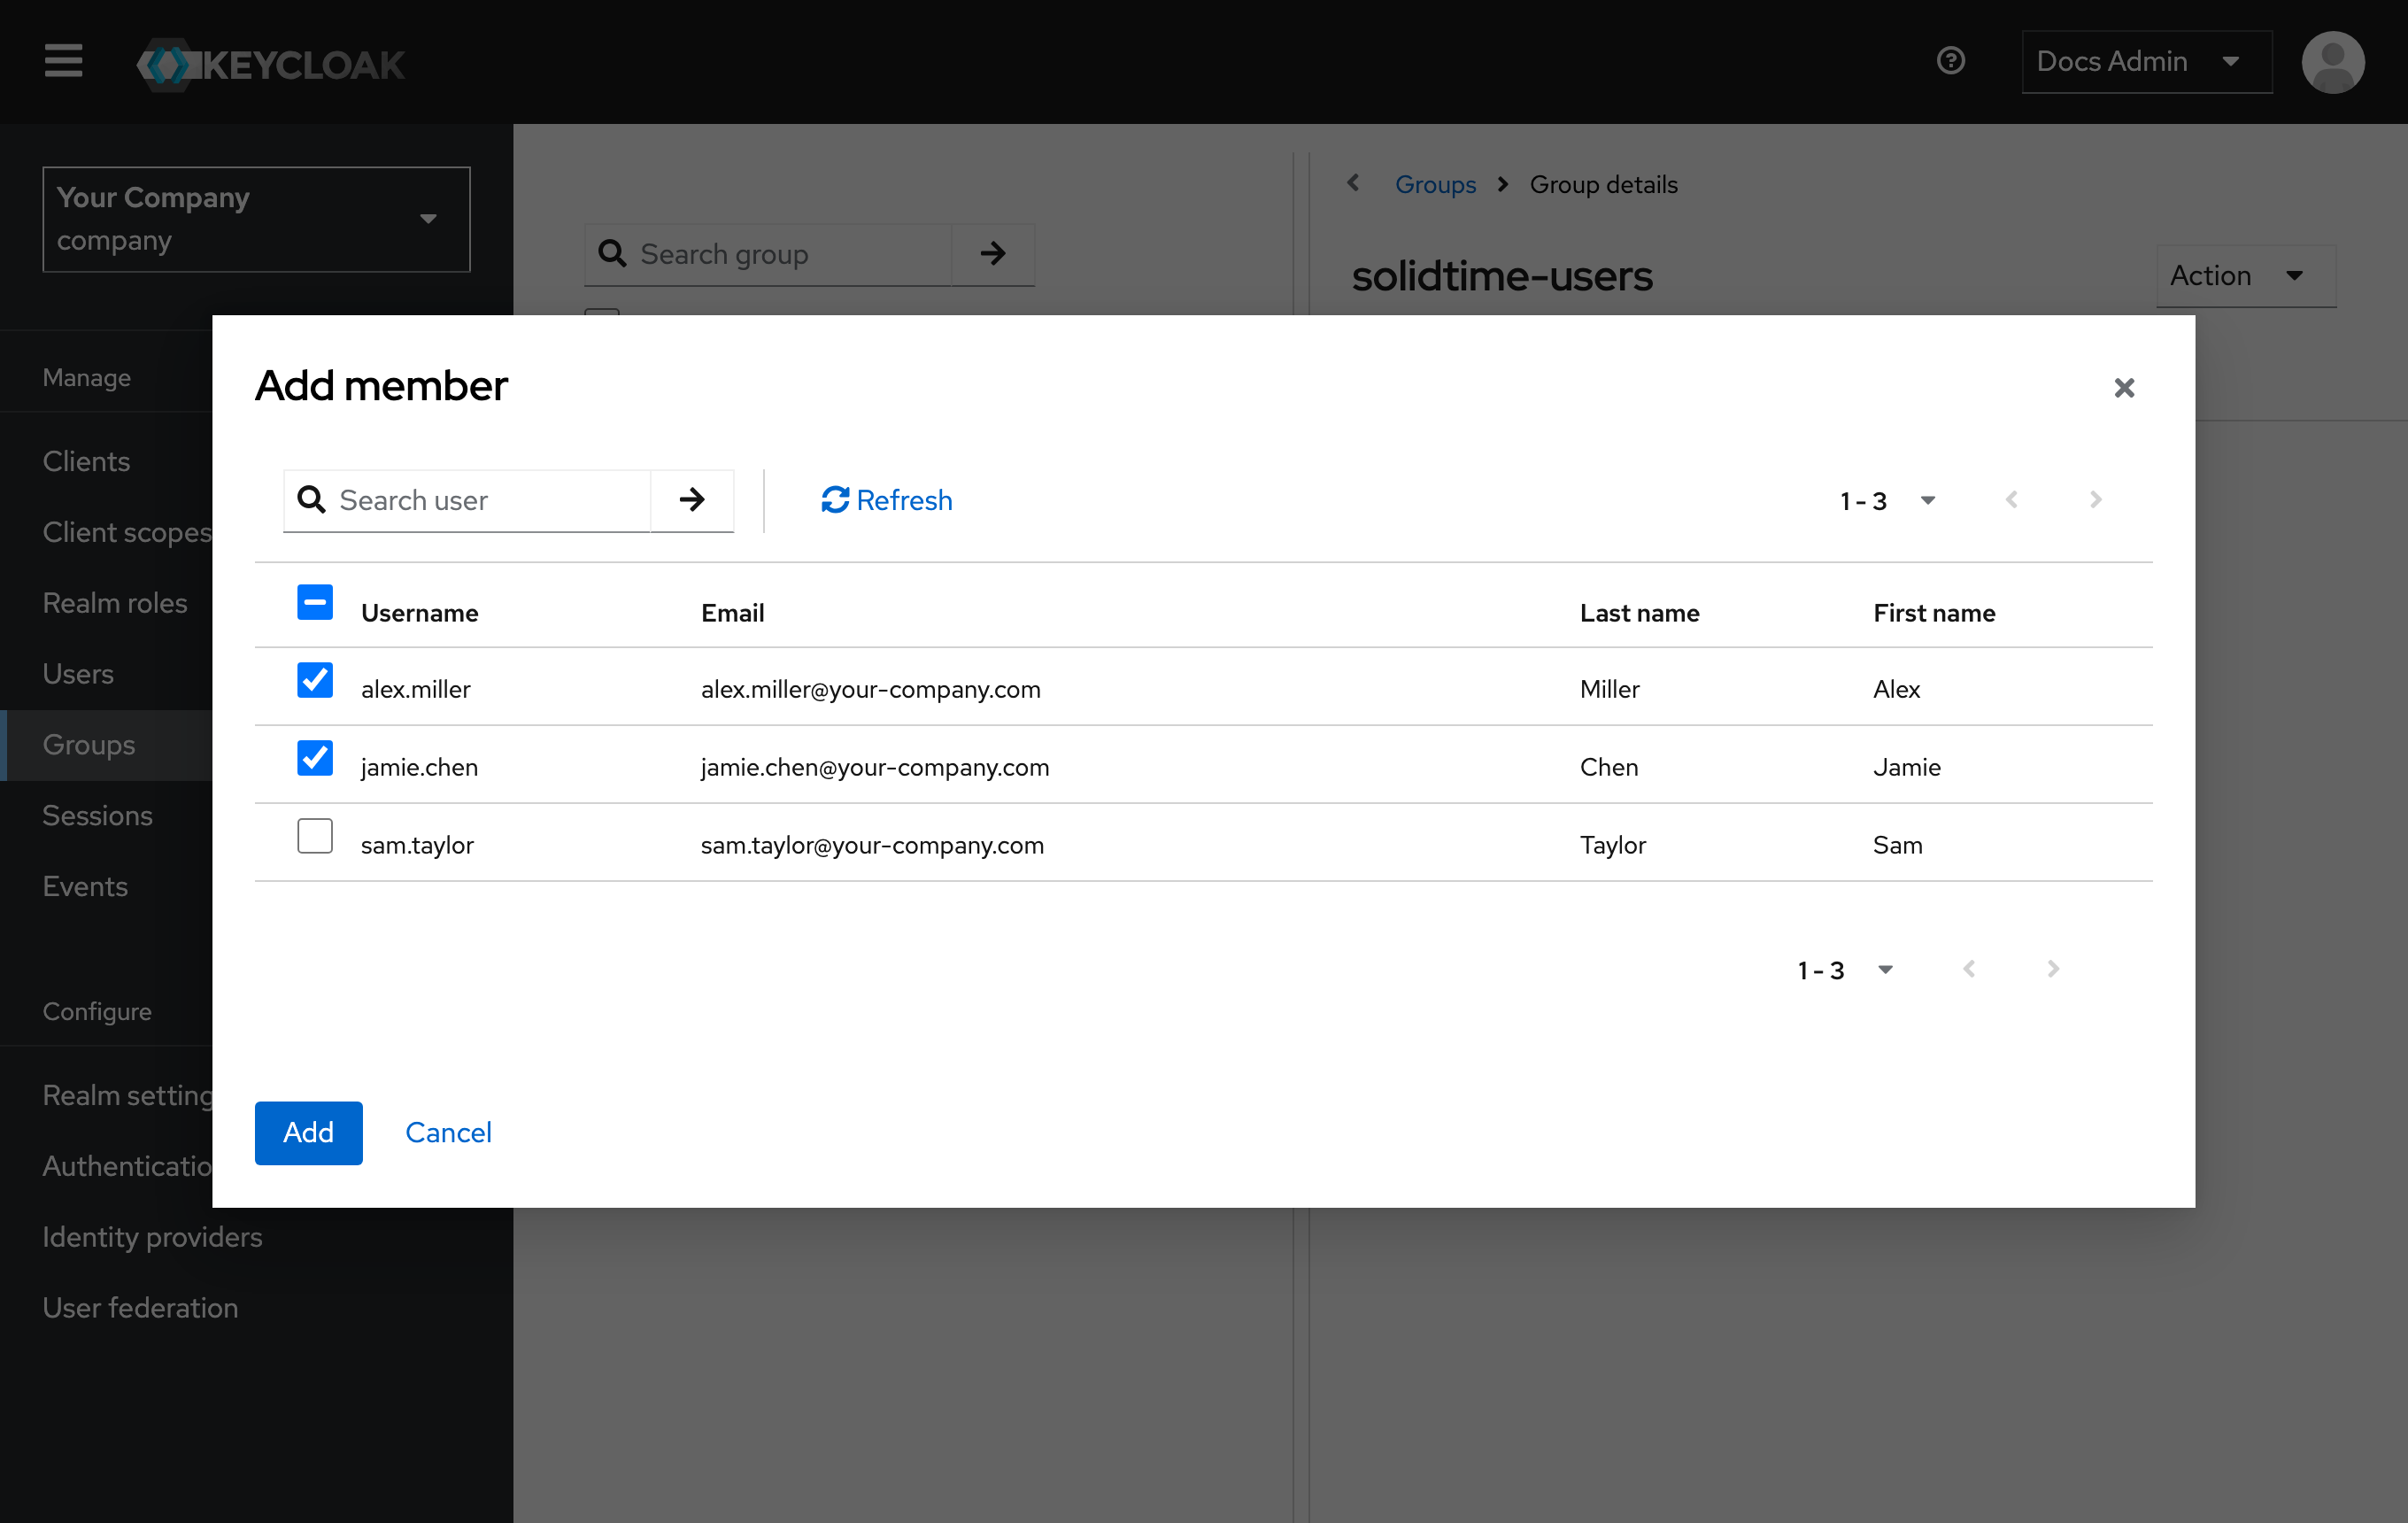
Open the group, go to its Members tab, click Add member, select the users, and click Add.
Realm roles
Keycloak's built-in roles mapper adds realm roles only to the access token, which solidtime doesn't read. To use realm roles, add them to the ID token for this client:
-
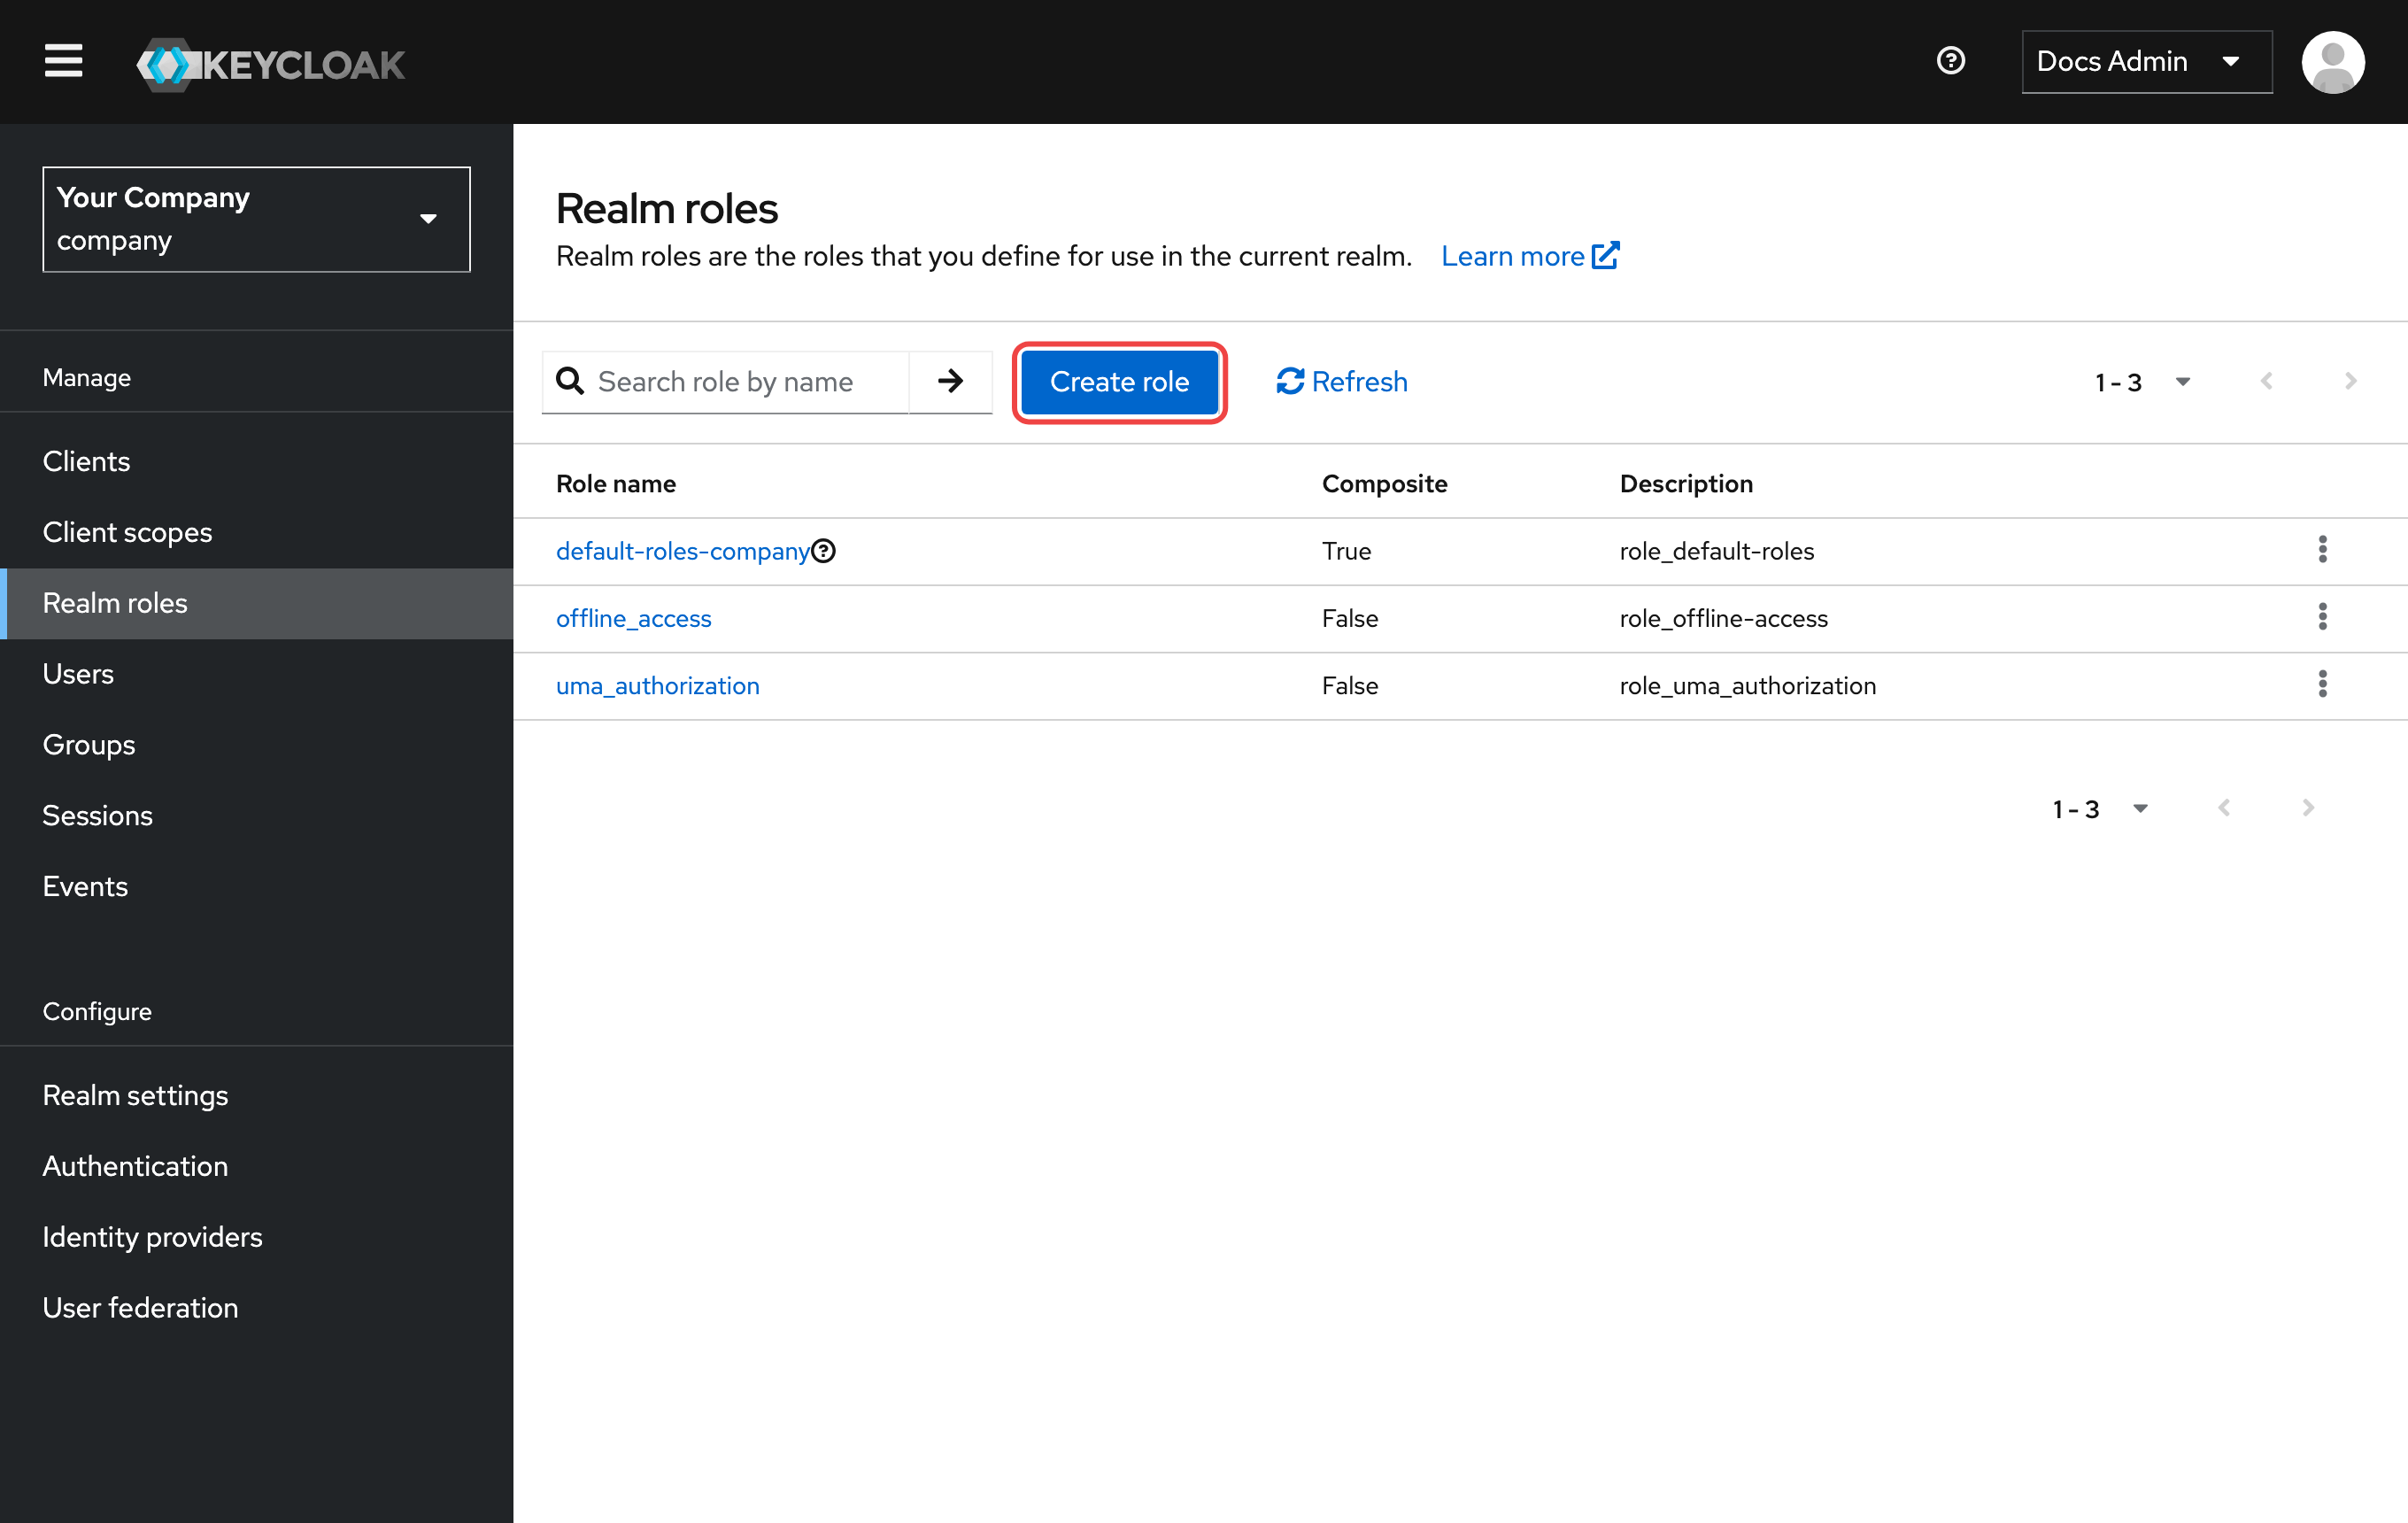
Under Realm roles, click Create role.
-
Enter a Role name such as
solidtime-userand save. Then assign the role to the users or groups that may use solidtime.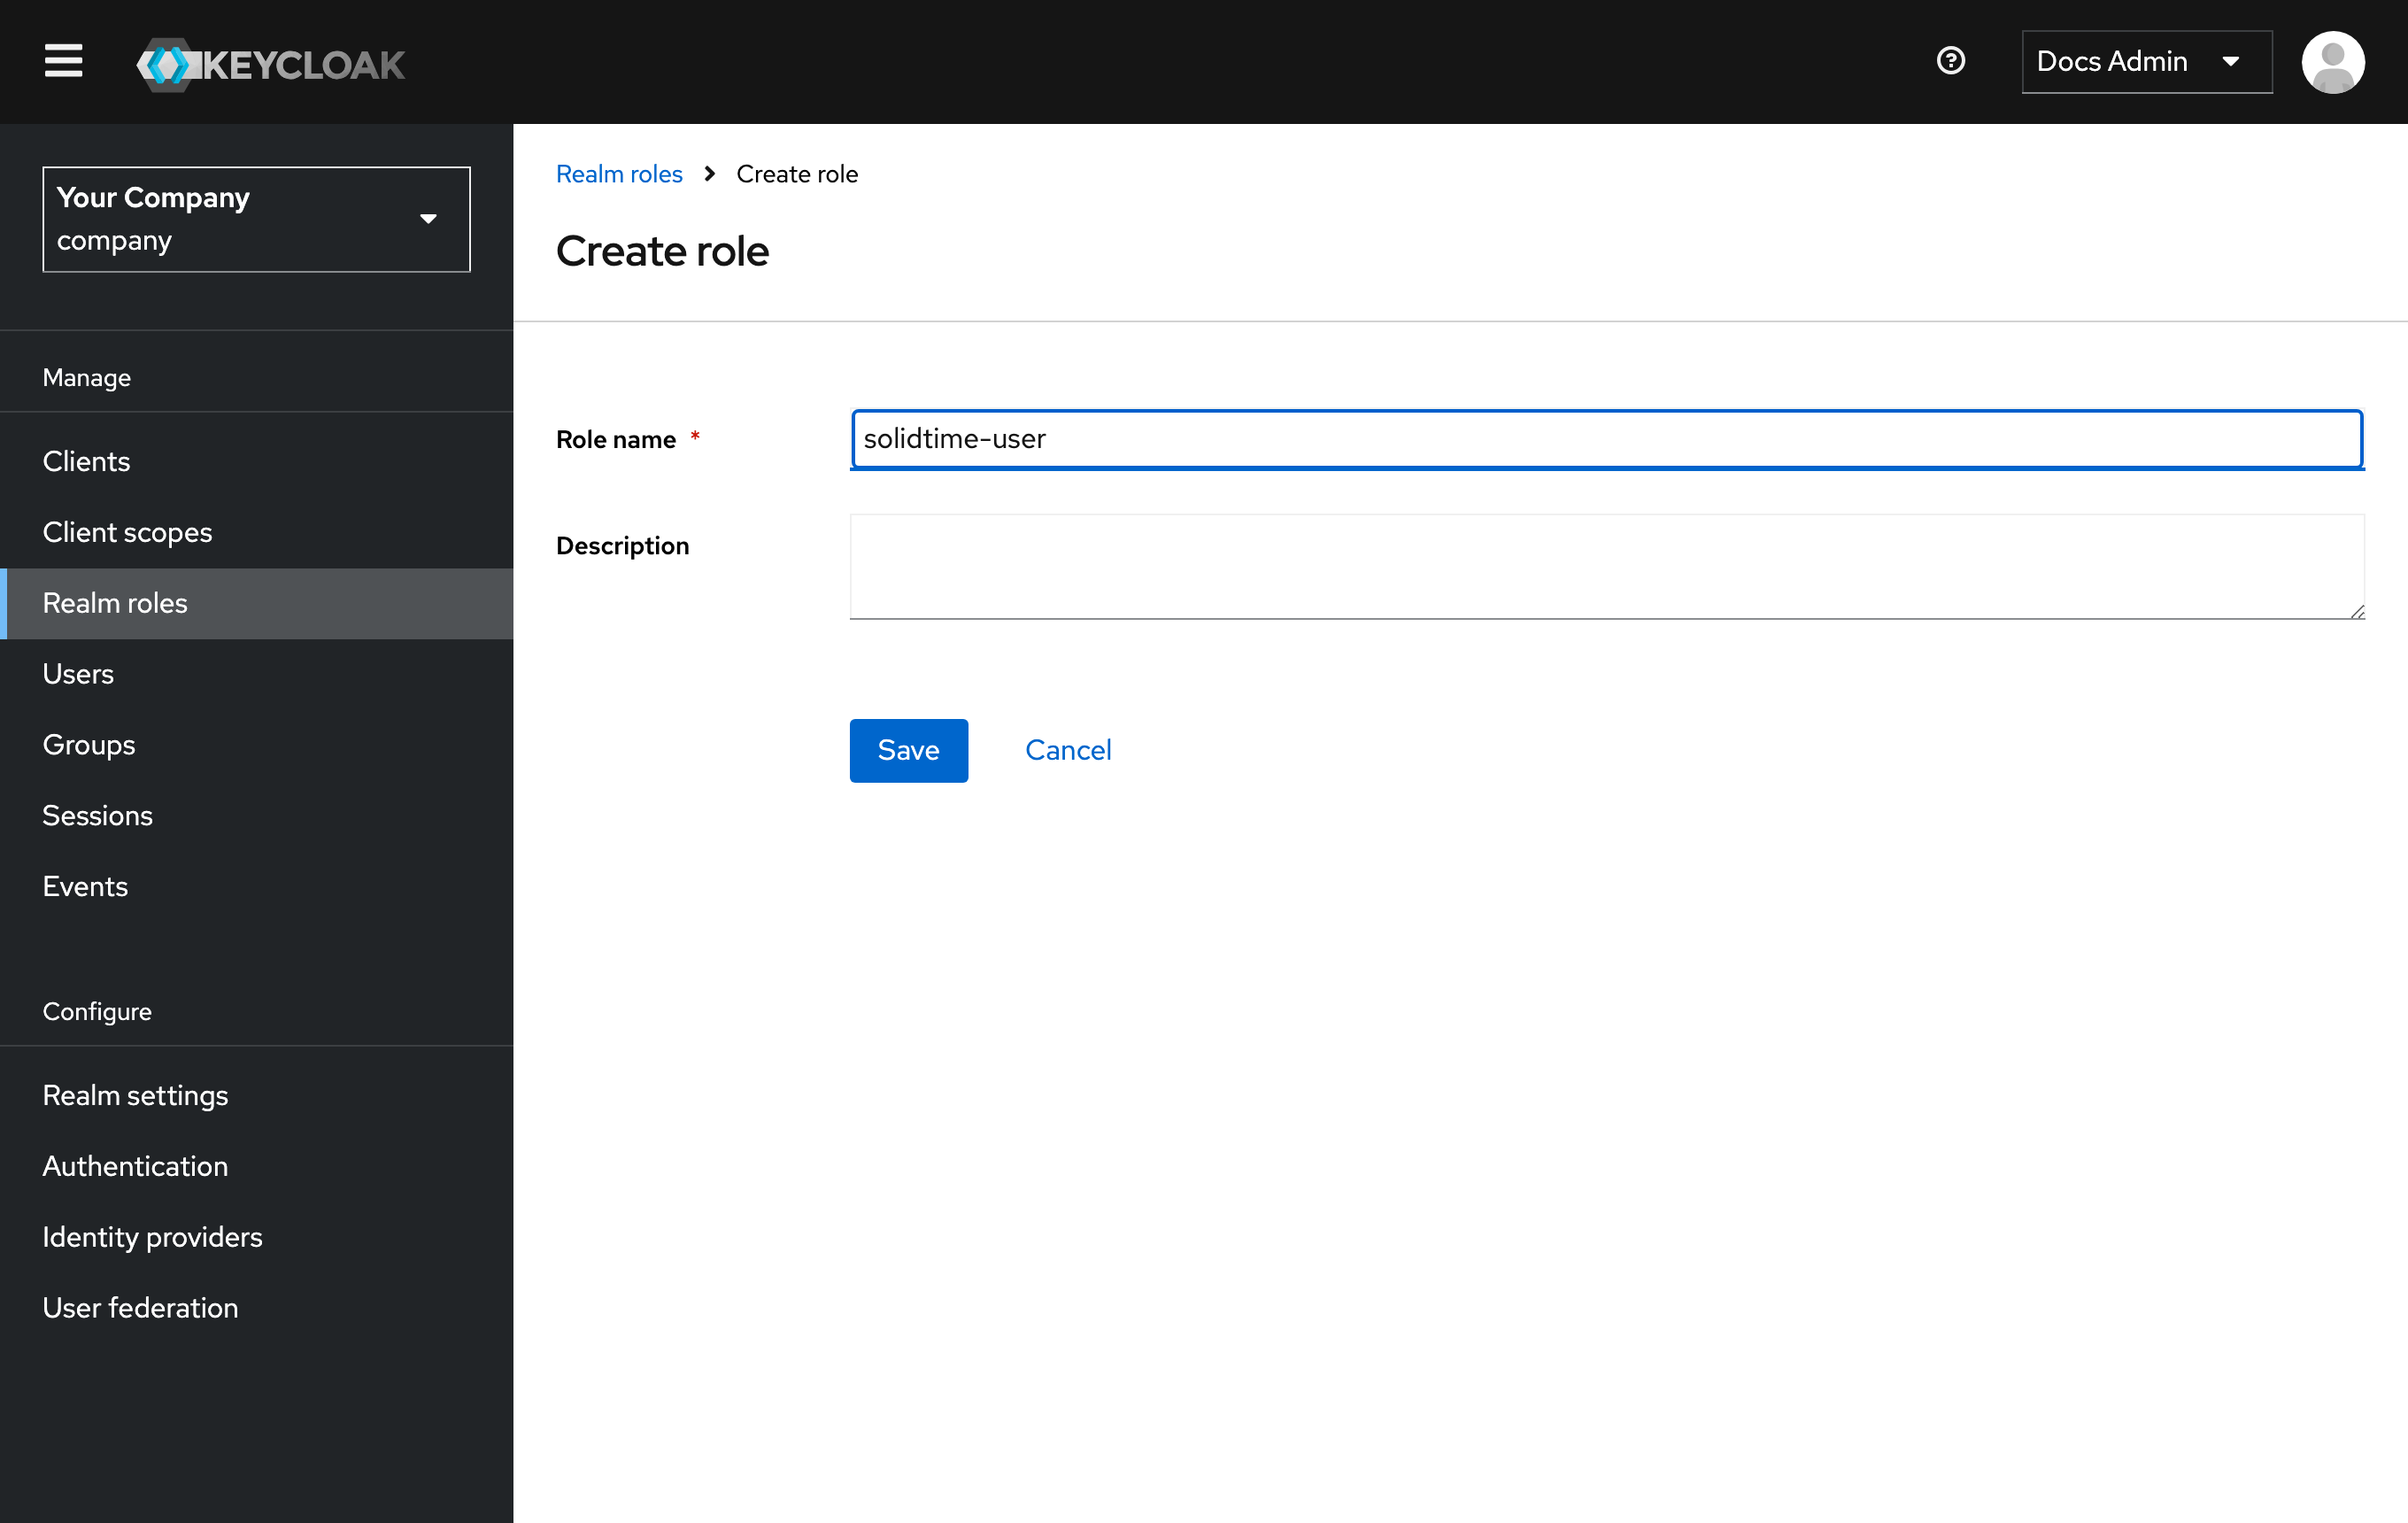
-
In the client's
solidtime-dedicatedscope, click Configure a new mapper (see above) and choose User Realm Role.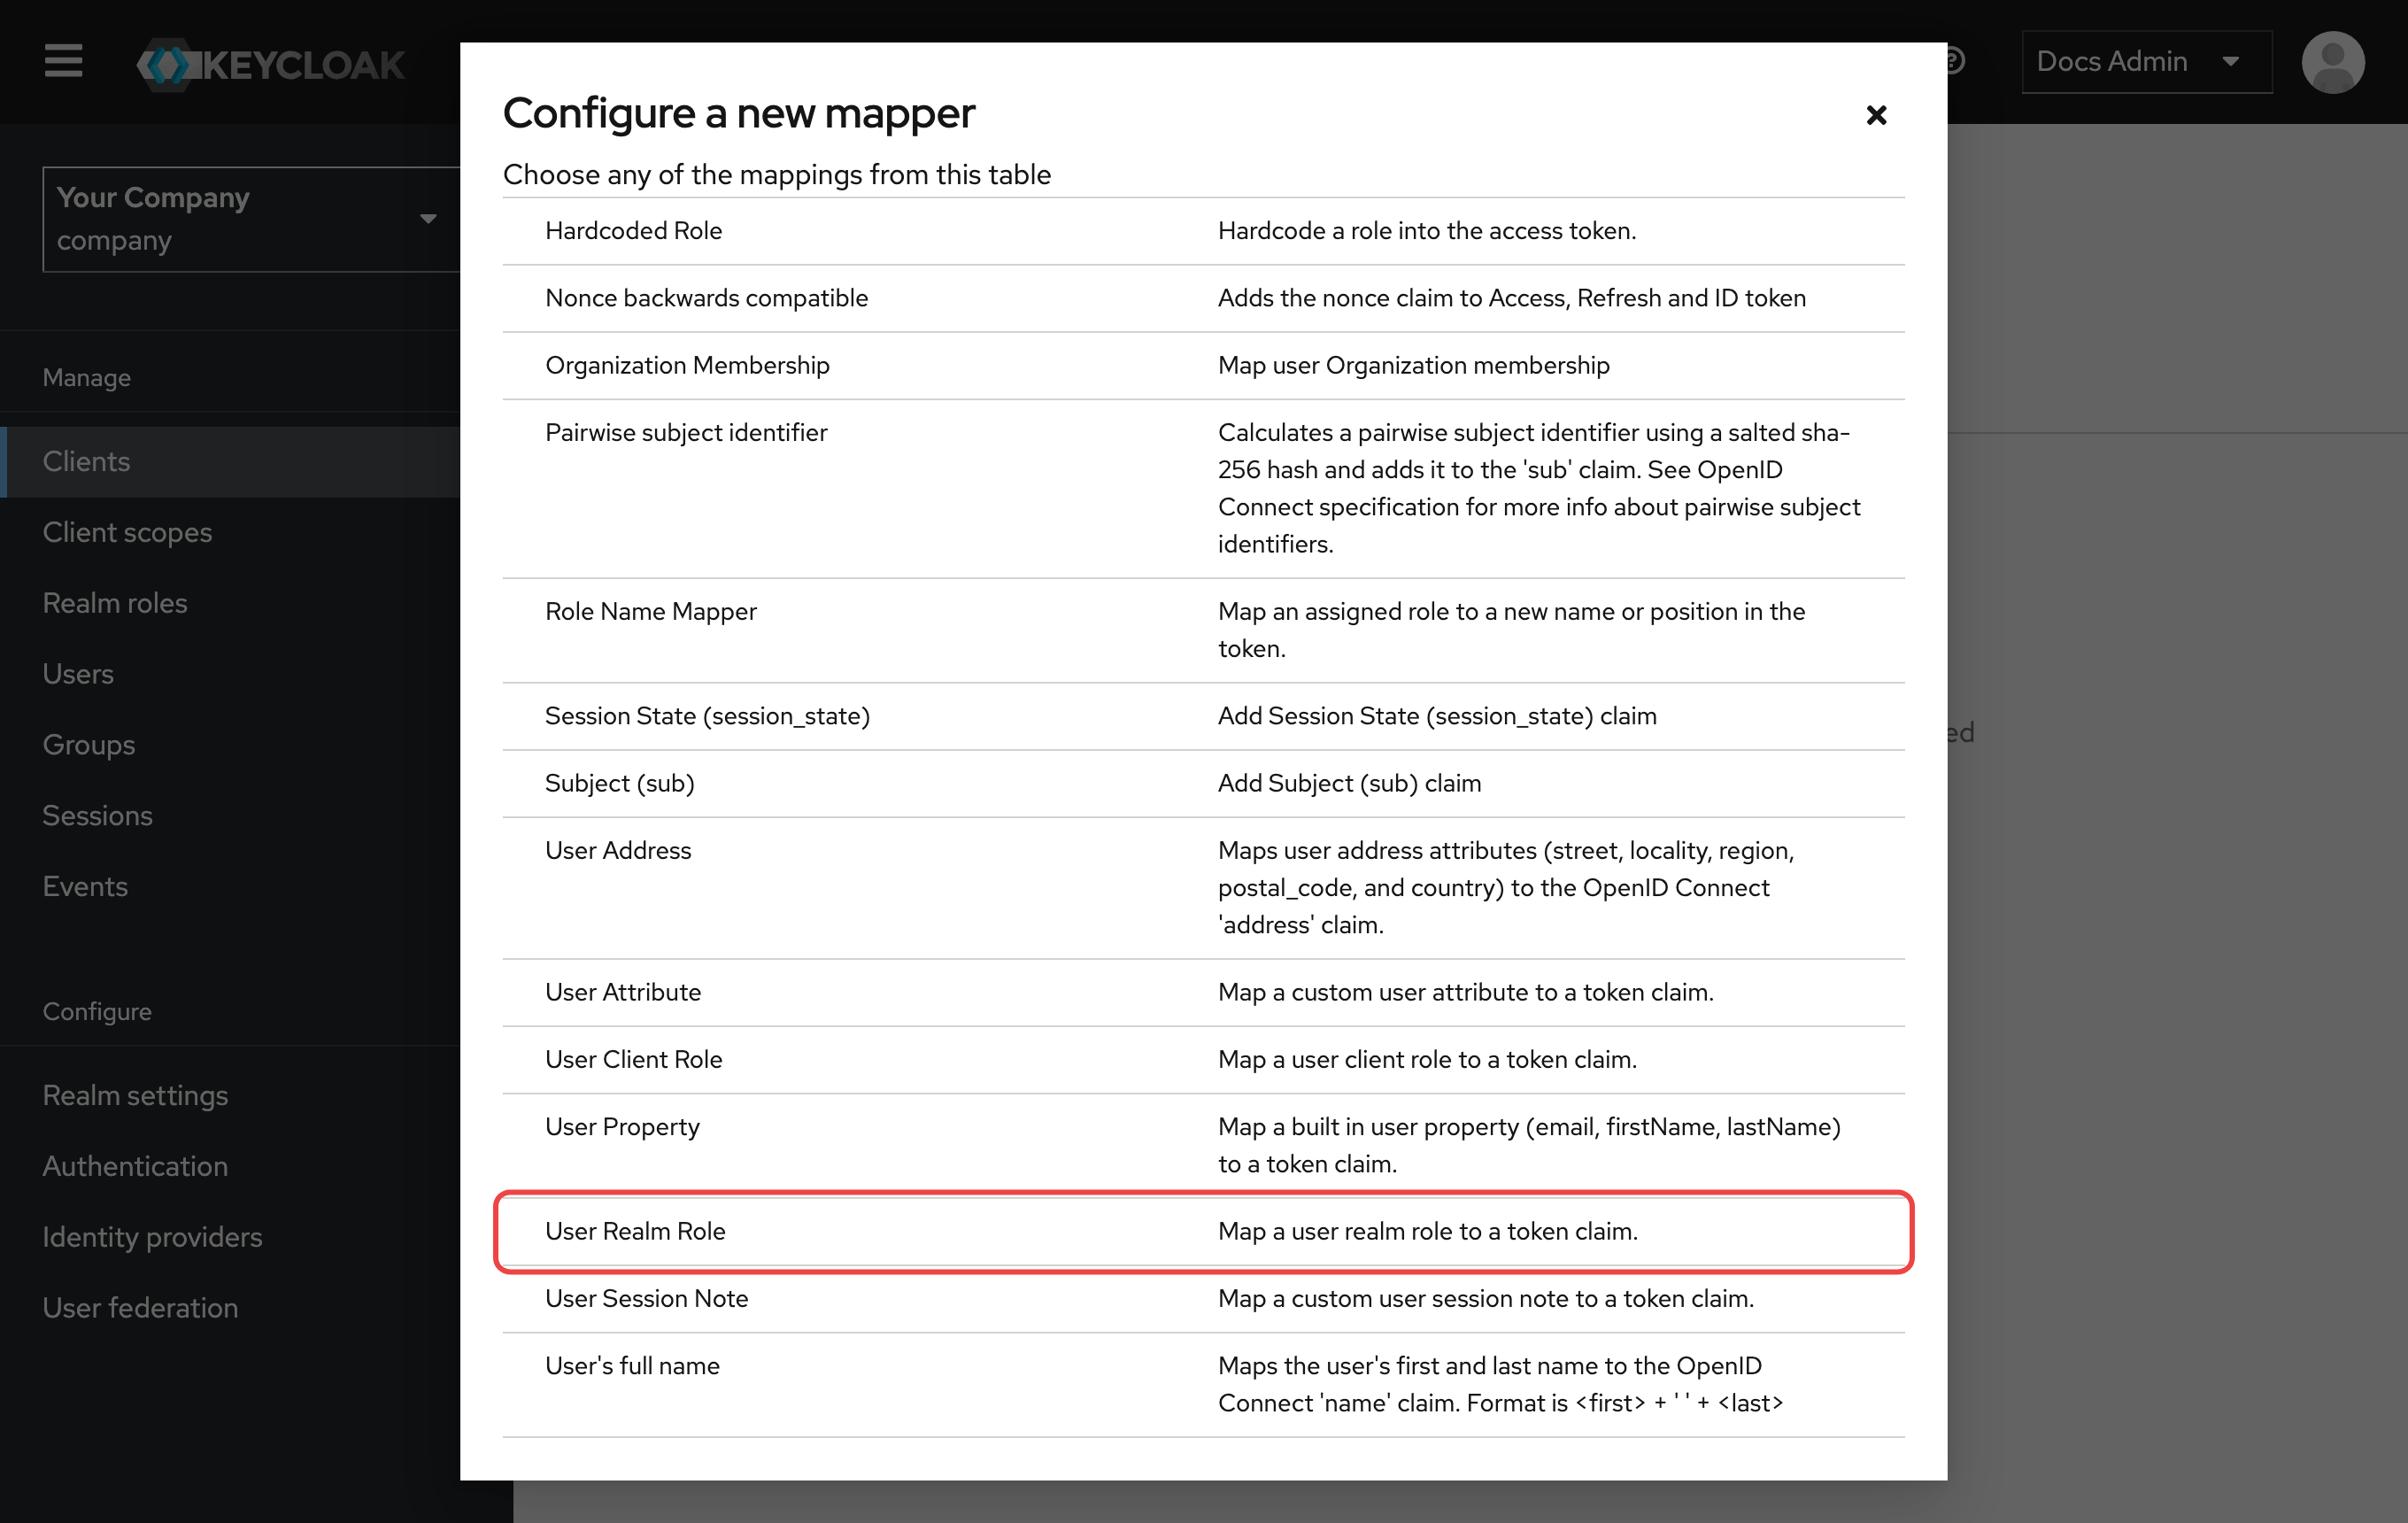
-
Set Name to
realm rolesand Token Claim Name torealm_access.roles, keep Multivalued and Add to ID token on, and save.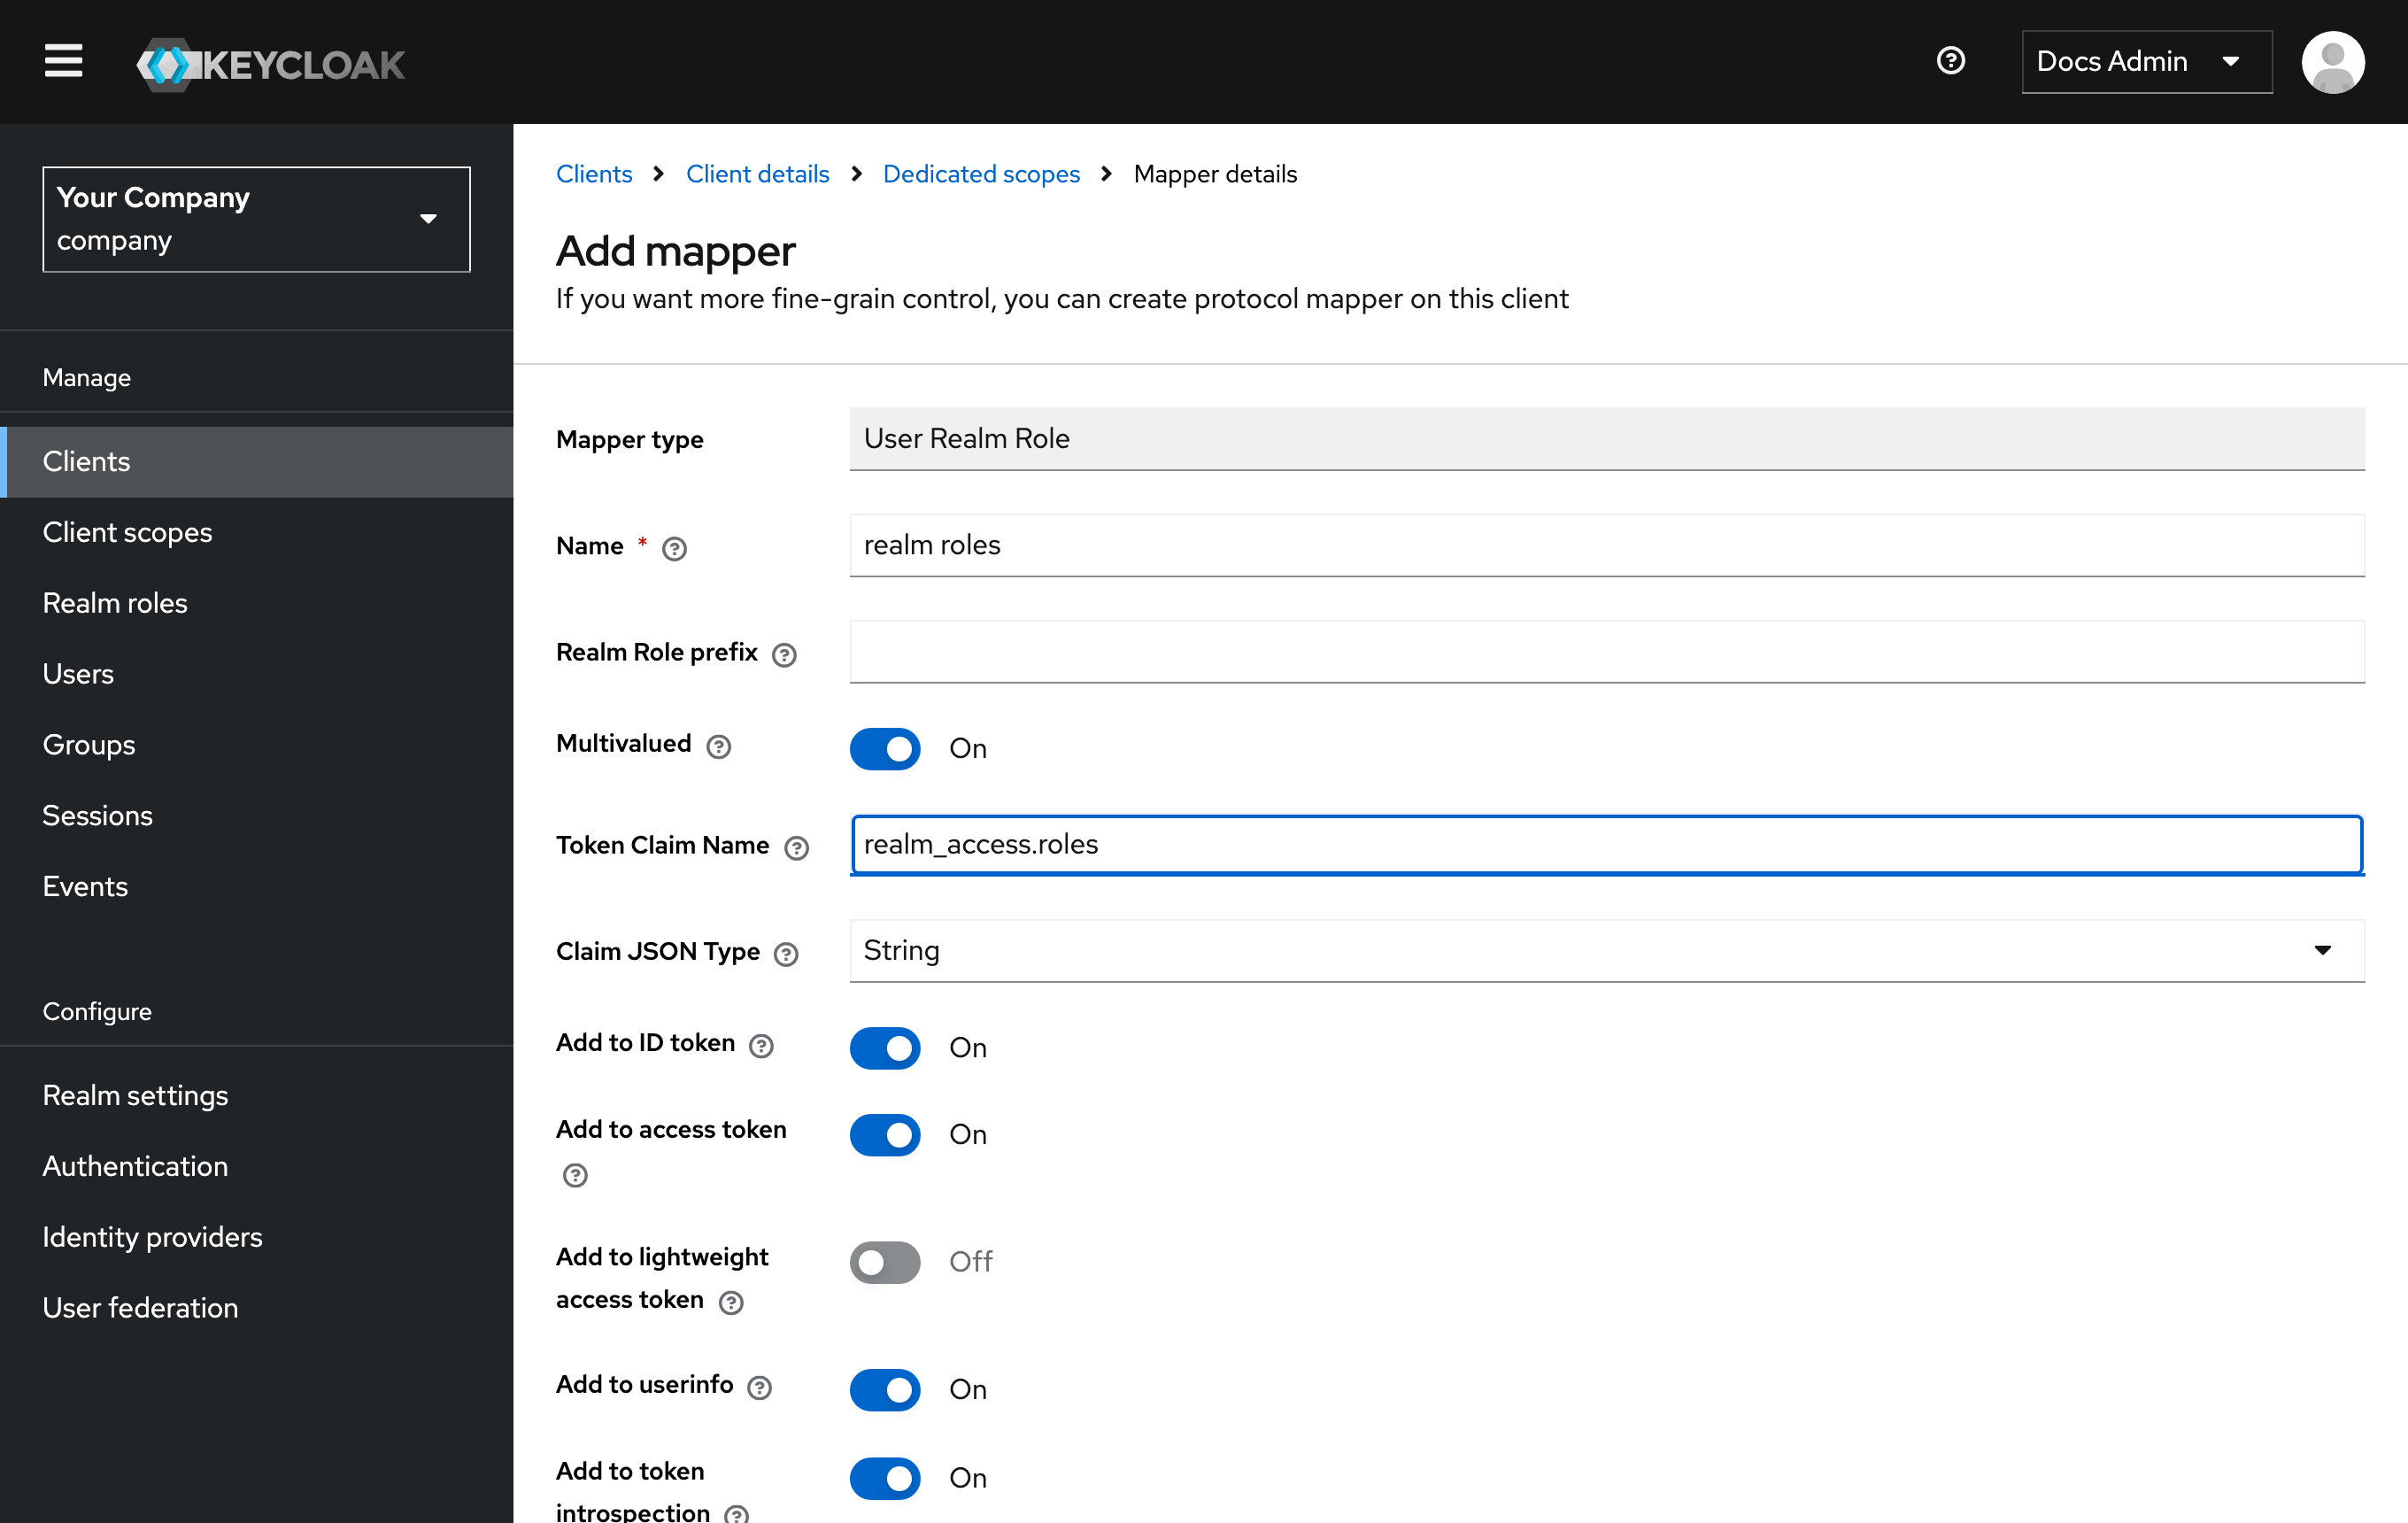
4. Configure the provider in solidtime
Edit the provider in solidtime and fill in Credentials and endpoints:
| Field | Value |
|---|---|
| Client ID | the client ID from step 1, for example solidtime |
| Client secret | the secret from step 2 |
| Base URL (issuer) | your realm's URL, for example https://keycloak.your-company.com/realms/company, then click Discover endpoints |
Under Behavior, choose who may sign in. For example:
- Auto provision on, Organization set to your company's organization.
- Required claims: the claim
groupswith the valuesolidtime-users(from step 3). With realm roles, use the claimrealm_access.roleswith the valuesolidtime-user. - Allowed email domains:
your-company.com, if all your users have addresses on your domains.
Save, then test and activate the provider as described in Test and activate.
Keycloak specifics
- Issuer: the realm URL
https://<host>/realms/<realm>. Older Keycloak versions (before 17) have/authin the path:https://<host>/auth/realms/<realm>. - Verified emails: Keycloak sends
email_verifiedfrom the user's Email verified setting. Users whose email isn't verified can't get an account or be linked by email. Verify them in Keycloak (Users → user → Email verified), or turn on Verify email under Realm settings → Login. - Hostname: the issuer in Keycloak's tokens is derived from its hostname configuration. If Keycloak is reachable under several hostnames (for example an internal and a public one), set
KC_HOSTNAMEso the browser and solidtime see the same issuer. Otherwise sign-ins fail with "Token issuer does not match the configured issuer". - Reverse proxy: if Keycloak runs behind a proxy that terminates TLS and doesn't trust the proxy's forwarded headers, discovery returns
http://endpoints and solidtime refuses to save them ("must use HTTPS"). SetKC_PROXY_HEADERS=xforwarded(orforwarded, depending on your proxy) and anhttps://KC_HOSTNAME, then discover the endpoints again. - Self-registration: if User registration is on under Realm settings → Login, anyone can create a Keycloak account and, with Auto provision, a solidtime account. Require a group or realm role (step 3) so only people you add get in.
- User federation: users from LDAP or Active Directory federated into Keycloak work like any other Keycloak user. Make sure the LDAP mapper fills the email and marks it verified (the "Trust Email" setting of the LDAP provider).
- Sign-out: signing out of solidtime doesn't sign the user out of Keycloak.